All Must-Knows to Use Fake GPS GO Location Spoofer On Apple iPhone 6s | Dr.fone
All Must-Knows to Use Fake GPS GO Location Spoofer On Apple iPhone 6s
It is highly risky to share sensitive information like location details on social media. Most social media access the location details when you perform any sort of activity on their platform. You would have given permission while installing the app for the first time on your phone. These details interest the criminals to commit the theft act at your place when you are on a vacation.
Do you know how to avoid such a situation? It is simple, try to trick the location details using Fake GPS Go Location Spoofer.
You can also make use of this app to spoof your location while playing location related games like Pokemon. This could give a chance to explore unique and more Pokemons around the globe. Those who make use of social media and play games online should know how to spoof location using an incredible app. Just scroll down to discover the techniques.

Part 1: About Fake GPS GO Location Spoofer
The Fake GPS Go Location Spoofer is the best app to trick the location details on the online space. This app implements the strategy promptly to acquire flawless results. The basic idea behind the fake GPS concept is that a false coordinates with respect to the Apple iPhone 6s device on the space recorded to the cyber grounds hiding the original location details.
The method adopted to embed this strategy varies with one app to another. The Fake GPS Go Location Spoofer handles this concept wisely and offers a simple procedure to achieve this task.
Features of Fake GPS Go Location Spoofer
- Exclusively designed for the Android Versions
- No need for Root mode
- The update version is available every now and then on the internet
- Fewer steps to complete this process
- No prior technical skills are necessary to understand the procedure
- Spoofing occurs just by a single tap on the app
- Awesome user interface
- Consistent introduction of app updates with solved bugs based on the feedback from the users
- Quick response to the user’s feedback from the team of Fake GPS Go Location Spoofer app
- Great customer service

Part 2: Fake GPS GO Location Spoofer: the For and Against voices
The FOR Voices on Fake GPS GO Location Spoofer
This app is helpful while playing games related to location. You can mock your friends and family for fun with the help of Fake GPS Go Location Spoofer app. Due to its versatile design, there are many ‘For Voices’ on the internet. The persuasive feature of this app attracts users from all age groups.
Voices of the Happy Users
- Precise location spoofing without any flaws
- Excellent tutorials to guide the novice users
- Free from unwanted advertisements
- Restores to the original location when required
- Outstanding compatibility with all versions of Android devices
- Ease Installation and setup process
- Flexible and customizable
The Against Voices on Fake GPS GO Location Spoofer
There exist disappointed users struggling to understand this app. The user’s face issues only if they were not able to follow the instructions promptly provided by the development team of Fake GPS Go Location Spoofer.
Voices of the disappointed users
- Some of the users struggle to work on this app considering it as a technical software
- Confused with the updates
- The updated versions were not appreciable
- It doesn’t work well with the Pokemon Go game
- This app download from Google Play store is not reliable

Part 3: How to use Fake GPS GO Location Spoofer on your Android
Step 1: Go to the Google Play Store and type ‘Fake GPS Go Location Spoofer’ on the search box in your Apple iPhone 6s to download this app.

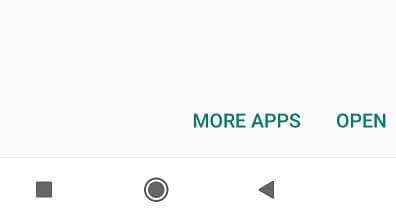
Step 2: Soon after the successful download tap ‘Open’ button.
Step 3: Allow the app to access the Apple iPhone 6s device’s location

Step 4: Accept the Advertising terms to proceed

Step 5: Next, you have to enable the ‘Mock Location’ option in the ‘Developer Option’ window. To do that you must go to ‘Settings-> Software info -> Built Number’. Tap the ‘Built Number’ few times based on the model of your Apple iPhone 6s to unlock into the ‘Developer option’. In the ‘Developer Option’, choose ‘Select mock location app’.

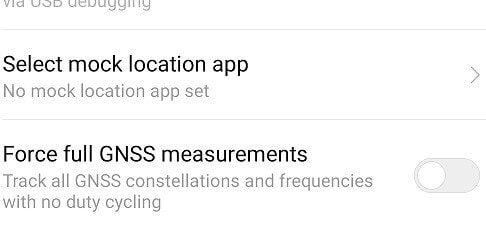
Step 6: inside the ‘Select mock location app’, you have to click the ‘FakeGPS Free’ to enable the mock location feature

Step 7: Now go to the ‘Fake GPS Go Location’ app and select your favourite spot on the map. Then press the ‘Play’ button. Select ‘Without Ads’ option to implement the changes accordingly.


Step 8: Finally, you have changed the default current location in your device using the Fake GPS Go Location Spoofer app successfully.

Step 9: Close this app and open the Google Map to check your current location you will be surprised to view the placeholder stays on your favourite spot thereby mocking the original location.

Part 4: Any other better alternative to Fake GPS GO
In this section, you will learn about the alternative tool to Fake GPS Go. The name of the alternative app is ‘Fake GPS Location’. It is a new app released this year 2019 to serve the users in a better way. You can download this software at Google play store without any issues.
Step 1: Check-in to play store and type ‘Fake GPS Location’ in the search bar. Tap the ‘Install’ button to trigger the downloading process.

Step 2: Open the app after the download process

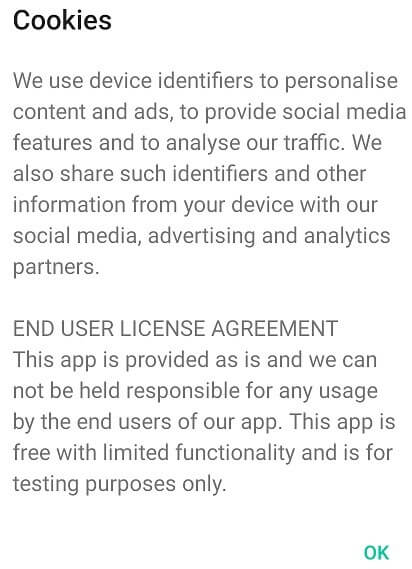
Step 3: Allow the app to access the Apple iPhone 6s device location and accept the ‘Cookies’ to work on this platform
Step 4: Now, you must enable the ‘Mock Location’ option through the settings. To do so click the ‘Settings’ then ‘Additional Settings’ finally hit the ‘Developer option’. Tap ‘Select Mock Location’ and choose ‘Fake GPS Pro’ from the displayed list. Now switch on to the app to proceed further.


Step 5: To implement the fake location you must select the desired place on the map and tap the ‘Play’ button. It will lead to another screen requesting for permission.

Step 6: Enable the settings and grant permission to fake the location on your device

Step 7: At last, the fake location is marked on your device using this app. Your device will show up this new location irrespective of your current place.

Now you had a clear picture of the ‘Fake GPS Location’ app in a detailed manner. It is enough if you follow the steps carefully to mark the fake location in no time.
Conclusion
There are many apps related to fake GPS on the internet space and spotting the right app is quite challenging. This article has given great guidance to choose the perfect tool to meet all the requirements precisely without regrets. The procedure is very simple and you can work on it by tapping the options accordingly.
Make use of the ‘Fake GPS Go Location Spoofer’ app to protect your live location details. With the help of this app, you can surf through any social media and play online games without any fear. Conceal the location information and increase your privacy through innovative products at the Google play store.
Part 5: Fake GPS GO has no app for iPhone? What to do?
Tricking the location by Fake GPS Go location spoofer can come in handy under many situations. However, when it comes to iOS devices, the users may get annoyed as the app has no iOS version. Therefore, you should be thankful to Dr.Fone – Virtual Location (iOS) that helps you serve the purpose without any Fake GPS Go apk. The tool is designed by Wondershare and never disappoints users for faking location. Let us know how you can pretend to be somewhere in an iOS device sans Fake GPS Go.
Mode 1: Teleport Anywhere
Step 1: To work with this Fake GPS Go’s alternative, install and launch it on PC. Click “Virtual Location” tab on the main screen.

Step 2: Take your iOS device and establish connection between PC and device. Hit on “Get Started” button now.

Step 3: You will notice your current location on the map. If not, hit the “Center On” located at the lower right on the screen.

Step 4: Choose the third icon on the upper right part of the screen from the three given icons. This is “teleport mode”. Enter the name of the location where you need to teleport and click “Go”.

Step 5: Then entered place will be recognized by the program and you need to click “Move Here” option in the pop-up dialogue.

Step 6: The location will be changed successfully. You can now see on the map or in the location based app in iPhone, the spot will be seen as the same you selected.

Part 2: Movement Simulation Between two Places
Step 1: Launch the tool and look for the first icon at the upper right screen which is “one-stop route”. Choose the place you want to travel on the map. You will know the distance in the pop-up box.
Step 2: The slider located below the screen needs to be dragged to set the speed of travelling. You can choose cycling speed or the speed you want. Hit on “Move Here” afterwards.

Step 3: Next, key in a number that will define the number of times you want to travel the route back and forth. Hit “March” option.

Step 4: Now, the position will be seen moving as per the chosen speed on the map. And this is how you can fake the movement sans Fake GPS Go apk.

Part 3: Simulate Route Movement for Multiple Locations
Step 1: For multiple spots, you need to click the “multi-stop route” after entering map interface. This mode is the second icon on the upper right side. Now, select the multiple places one by one where you want to pass.
Step 2: The pop-up will show the distance where you need to hit the “Move Here” button. Choose the moving speed.

Step 3: Enter a digit for how many times you want to take route and click “March”. This will begin the movement simulation.

Dr.Fone - Virtual Location
1-Click Location Changer for both iOS and Android
- Teleport from one location to another across the world from the comfort of your home.
- With just a few selections on your computer, you can make members of your circle believe you’re anywhere you want.
- Stimulate and imitate movement and set the speed and stops you take along the way.
- Compatible with both iOS and Android systems.
- Work with location-based apps, like Pokemon Go , Snapchat , Instagram , Facebook , etc.
3981454 people have downloaded it
How To Use Special Features - Virtual Location On Apple iPhone 6s?
Wondershare Dr.Fone - Virtual Location comes with multiple unique features that can be used to enhance the flow of spoofing location. With all these amazing features, you can easily change your iOS location without blinking an eye. Rather than making things complicated, Dr.Fone makes it easy for you to manage operations when you perform actions like changing Android locations.
Part 1: Circle Route (For Multi-Stop Route)
The circle route feature is under the multi-stop route mode. When your starting point is close to the ending point, a pop-up asks if you want to set up a circle route. Click Yes to create a circular path on the map.

Part 2: Realistic Mode (For One-Stop Route and Multi-Stop Route)
This particular feature makes the simulation look realistic with the ability to fluctuate the speed of the simulation. If you wish to turn on realistic mode for the one-stop or multi-stop route, look for the respective checkmark option in the panel on the left.

Part 3: Fluctuation Mode (For Teleport Mode)
Whenever you are teleporting your smartphone device to another location, you can try using the fluctuation mode feature offered against it. As you activate Teleport Mode from the top-right section and search for a location, you will discover the Fluctuation Mode toggle in the confirmation tab. Turn on the toggle to slightly switch the location from the selected point to show realistic motion.

Part 4: Cooldown Timer (For Teleport Mode and Jump Teleport Mode)
While teleporting the location of your smartphone to different places for playing games like Pokemon Go, you are bound to activate a cooldown timer within your location-changing app to show realistic movement. By locating the Cooldown Timer on the right pane of icons, activate it, and this feature will automatically calculate the cooling time by measuring the distance between your destination and the starting point.

It is recommended not to start the movement until the cooldown time is completed to avoid unnecessary bans. Moreover, you can also activate the Auto jump after cooldown in the Jump teleport mode after turning on the Cooldown Timer.
This option will automatically jump you to the next destination once the timer ends. It is helpful for games like Pokemon Go, where the game servers can detect frequent jumps with no cooldown time.
Part 5: Import/Export GPX File
You can also import and export specific navigated locations from Dr.Fone in the form of GPX files. While you can export GPX files for keeping a record of your location, you can also import such files for inserting specific locations to simulate or teleport to. Find out how you can import and export GPX files with this location-changing application:
Step 1Export the GPX File
If you have defined a proper location to simulate at a particular instant using Dr.Fone - Virtual Location, you can have this location exported by clicking the Export icon on the top of the left panel. This will open a window where you can set the location for saving the GPX file.

Step 2Import a GPX File
For importing a GPX file on the platform, click the Import button on the right pane. As this opens a window, select the GPX file you wish to import to the platform.

Step 3Wait for the File to be Read
Wait for a moment until Dr.Fone - Virtual Location recognizes the specific locations within the GPX file and displays them on the map.

Part 6: Historical Records
If you want to use a similar track record on your smartphone again, you can access the historical records saved on the platform for easy access.
Step 1Open Historical Records
Click the Historical Records button on the right pane to access the entire history involving the connected smartphone and the location spoofing platform.

Step 2Access Any Location from the History
Select the Go button adjacent to any particular historical record to re-launch a similar simulation for the Apple iPhone 6s device. You can also click Clear All to delete all historical records.

Part 7: Favorite List
You can also set up favorite locations within the platform to define quick accessibility to your favorite locations. To do that, you have to follow the guidelines shown next:
Step 1Favorite Specific Locations
While setting up locations in Jump Teleport Mode, One-Stop Route, or Multi-Stop Route, you can tap on the Favorite icon adjacent to every marked location or favorite an entire route with the Favorite icon on the top of the left panel.

Step 2Access your Favorite Section
To look for your favorite locations, look for the Favorite icon on the right pane to open a list containing all locations you have marked. You can choose the Move option to automatically move into a particular location in no time.

5 Easy Ways to Change Location on YouTube TV On Apple iPhone 6s
Through YouTube TV, people can access different TV channels such as news, sports, and entertainment. However, as every YouTube TV works in accordance with the assigned home area, sometimes you can forget or are unable to change the home area, which can lead to certain restrictions. If you want to change the location of YouTube TV to access more services, this article is for you.
Continue reading this article to learn how to change your YouTube TV location with the help of easy methods so that you won’t tire yourself. You can easily bypass YouTube TV restrictions by following this authentic guide.
Part 1: Change your Home Area to Change Location on YouTube TV
Before jumping on the method to change YouTube TV location, keep in mind that YouTube only allows changing the location twice a year. In this part, we will provide a manual method to change location on YouTube TV for both iOS and Android devices:
How to Change Your Home Area on an iOS Device
Step 1: Start logging into your YouTube TV account and navigating to your profile icon. Select “Settings” and then tap on “Area.”
Step 2: Afterward, tap on “Home Area” and then choose the option “Update” right next to it.
How to Change Your Home Area on a Computer or Android
Step 1: Signing to your YouTube TV on your Apple iPhone 6s or through a web browser. Afterward, tap on your profile icon to proceed.
Step 2: Go to “Settings” from the profile and then select “Area.” Now, locate the “ Home Area” option and click on it.
Step 3: Tap on the “Update” option next to the “Home Area” option.
Part 2: Using VPN to Bypass YouTube TV Restrictions
Sometimes, users encounter certain YouTube TV restrictions due to their home area changes. This section will suggest four amazing VPNs to help you bypass any YouTube TV restrictions.
1. NordVPN
NordVPN is a well-trusted VPN that provides exceptional security and protection from malware attacks. Furthermore, by using this VPN, you can change your device or computer location to any country by selecting a fast and secure server from its available options. Hence, you can enhance your cyber security to a great level through this platform while accessing inaccessible content.

2. Surfshark
Do you want to encrypt your browsing activity on your devices? Use Surfshark to browse in a secure manner so that no one can steal or track your information. You can also change your location through this platform to strengthen your privacy across online sites. You can access any specific YouTube TV content by selecting any location from its US servers category.

3. ExpressVPN
ExpressVPN enables the users to change the server’s location anytime and from anywhere across the world. It gives great reliability access to the server location in 94 countries. Moreover, you can enjoy internet browsing with great network speed through it.

4. CyberGhost
To bring your digital security to the next level, CyberGhost is a good option to rely upon. It is a one-click location changer VPN that helps you connect anywhere within seconds with a secured IP address. After that, you can anonymously visit and use online sites through its encrypted VPN protocols and safely hide your identity.

NordVPN | Surfshark | ExpressVPN | CyberGhost | |
Ranking | 1 | 2 | 3 | 4 |
Max Contract Length | 24 Months | 24 Months | 12 Months | 39 Months |
Torrenting | ✔ | ✔ | ✔ | ✔ |
Monthly Plan Cost | $11.99 | $12.95 | $12.95 | $12.99 |
IP Addresses | 5000 Servers | 3200 Servers | 3000 Servers | 8000 Servers |
Support System | Windows, Mac, iOS, Android | Windows, Mac, iOS, Android | Windows, Mac, iOS, Android | Windows, Mac, iOS, Android |
Support Main Streaming Platforms | Netflix, Amazon Prime, Disney+ | Netflix, HBO Max, Hotstar | Netflix, Apple TV+, Hulu | Netflix, HBO Max, Disney+ |
Part 3: One-stop Tool to Change GPS Location on iOS and Android
Although VPNs provide a great way to change YouTube TV location through IP address, it still lacks accuracy with the location. To be more precise with region accuracy, Dr.Fone – Virtual Location changes GPS location to connect your Apple iPhone 6s with a particular area in a specific city. As VPNs change the location by connecting to the city’s server via IP address, Dr.Fone targets the exact location in any city by using GPS.
Dr.Fone - Virtual Location helps the users locate a precise location for YouTube TV to access specific TV channels and features. Moreover, you can instantly change your YouTube TV location with a single click. Using this tool, you can fake your location anywhere in the world with excellent speed.
For changing YouTube TV location through Dr.Fone, use the below instructions:
Step 1: Navigate Virtual Location
Download Dr.Fone on your computer and open its main home page. Select “Virtual Location” from the displayed options by clicking on it. Now connect your smartphone to your computer via a USB cable.
Step 2: Show Current Location
A new window will pop up displaying your current location on a map. However, if you cannot locate it, click on the “Center On” icon that will show your current location.
Step 3: Turn On Teleport Mode
To turn on the teleport mode, click on the second icon that you can locate on the top right. Then, type the area in the search box and press the “Go” button.
Step 4: Confirm Location
Confirm by clicking on the “Move Here” option on the pop-up message. Once done, your phone will be connected to the chosen location, and thus YouTube TV location will be changed automatically.
Part 4: FAQs
- Is it allowed to watch YouTube TV other than the home area?
Yes, it is allowed to watch YouTube TV other than the home area in the US, but the channels will differ from location to location. You can watch national programs, including local programs and other YouTube videos, while traveling domestically in the US.
- How to modify the time zone on YouTube TV?
To change the time zone on YouTube TV, open your YouTube TV and click on your profile icon. Next, go to the “Settings” and tap on the “Area.” Now, locate “Home Area” and upgrade the time zone concerning your home area.
- Is it possible to watch YouTube TV in multiple locations?
You can easily watch YouTube TV in multiple locations, but to be careful, you should check your home area frequently in a month to be aware of local networks.
- Are users allowed to watch YouTube TV at two different houses?
YouTube has provided easy access through membership that allows the users to watch YouTube TV at two different houses. You can create a family group and let 5 members watch YouTube TV.
Conclusion
This writing comprises a detailed guide regarding the YouTube TV change location and the exact steps. We have also mentioned some of the well-trusted VPNs to change YouTube TV location, but to be precise in the results, we have suggested Dr.Fone - Virtual Location as a complete and advanced tool for changing the location.
Also read:
- [New] How To Download WhatsApp Ringtone And Customize It On iOS And Android for 2024
- [New] Screencast Mastery Guide Essential Tips Unveiled
- 10 Best Fake GPS Location Spoofers for Lava Blaze Curve 5G | Dr.fone
- 3 Ways to Fake GPS Without Root On Itel P55 | Dr.fone
- 3 Ways to Fake GPS Without Root On Meizu 21 | Dr.fone
- 5 Best Route Generator Apps You Should Try On Oppo A1x 5G | Dr.fone
- 5 Best Route Generator Apps You Should Try On Vivo S17 Pro | Dr.fone
- 5 Hassle-Free Solutions to Fake Location on Find My Friends Of Oppo F25 Pro 5G | Dr.fone
- 6 Ways to Change Spotify Location On Your Xiaomi Mix Fold 3 | Dr.fone
- A Detailed Guide on Faking Your Location in Mozilla Firefox On Tecno Spark 10 4G | Dr.fone
- Comprehensive Fix for the Troublesome Error Code 0X80070652 in Windows Update System
- Diagnosing the Stutters in Call of Duty: Modern Warfare 3 FPS Gameplay - Insights
- Full Guide to Unlock Your Honor Play 7T
- High-Definition National Flag Icons in a Comprehensive Collection by YL Computing: Your Ultimate Graphic Asset Library
- In 2024, Pokemon Go Error 12 Failed to Detect Location On Oppo Reno 11F 5G? | Dr.fone
- Introducing ChromeOS's New Version with Enhanced Windows 11-Style Functionality for Chromebook Users | GadgetFlow Insights
- Step-by-Step Guide: Adding Subtitles to Your Instagram Story Highlights
- Title: All Must-Knows to Use Fake GPS GO Location Spoofer On Apple iPhone 6s | Dr.fone
- Author: Mia
- Created at : 2025-01-09 17:04:01
- Updated at : 2025-01-15 16:27:18
- Link: https://location-fake.techidaily.com/all-must-knows-to-use-fake-gps-go-location-spoofer-on-apple-iphone-6s-drfone-by-drfone-virtual-ios/
- License: This work is licensed under CC BY-NC-SA 4.0.