
A Detailed Guide on Faking Your Location in Mozilla Firefox On Itel A70 | Dr.fone
A Detailed Guide on Faking Your Location in Mozilla Firefox On Itel A70
Mozilla Firefox is one of the most famous browsers known for its security. Like other browsers, it also tracks your location and shares it with websites. Although Firefox asks for your permission before sharing your location, it can still be a privacy concern for many people. For many reasons, disabling your location is disadvantageous, so Firefox spoof location can resolve your concerns.
It is not hard to change or spoof your location in Mozilla Firefox. Stick with this article to learn different ways to fake a location in Firefox on devices.

Part 1: Preparations Before Spoofing Your Location in Firefox
Before starting with Firefox location spoof, you must be aware of how the platform and websites determine your location. There are many ways a browser can detect your location. It includes services like IP addresses, GPS tracking, Wi-Fi, and Bluetooth. The main tool browsers and websites use to determine your location is HTML5 Geolocation API.
1. Basic Understanding of the HTML5 Geolocation API
Basically, a browser API called HTML5 Geolocation API is used by websites and browsers to detect a user’s location using longitude and latitude coordinates. It is strictly based on user permissions for detecting location. That means you will receive a permission prompt whenever a website or browser uses it to detect your location. If you refuse the permission, they can’t use this API for location determination.
2. How Does HTML5 Geolocation Work?
HTML5 Geolocation determines your location using the longitude and latitude coordinates with the help of GPS. If your device doesn’t have GPS tracking, it uses Wi-Fi and cell tower signals to detect the Itel A70 device’s location. The location detected by HTML5 Geolocation is highly accurate with accuracy up to street level. Due to its high precision in locating users, it can create privacy issues for users.
Part 2: How to Fake Your Location in Mozilla Firefox on Computers
Many ways are available for you to fake or disable your desktop location in Mozilla Firefox to address your privacy concerns. You can either disable or change the location in the browser or use a third-party app or extension. Below, we have explained the three most common ways to fake or disable your location in Firefox.
Method 1: Disable Geolocation in Firefox
If you want to stop websites from accessing your location from Mozilla Firefox, you can disable the geolocation feature using Firefox Settings. The process to disable your location in Mozilla Firefox is covered using these steps:
Step 1: Open Mozilla Firefox on your computer to disable its location. Click the “Three Vertical Bars” icon to select “Settings.” Now, tap “Privacy & Security” from the left sidebar and navigate to “Permissions.”

Step 2: Click “Settings” in front of “Location” to manage the location settings. It will open a window with a list of all the websites that can access your location. Depending on your needs, you can choose between “Remove Web Site” or “Remove All Web Sites” to remove their location access.

Step 3: If you want to block the websites from accessing your location indefinitely, you can select the “Block new requests asking to access your location” option. Once selected, click “Save Changes” to disable your geolocation on Firefox.

Method 2: Manually Change Your Firefox Location
Disabling your location on Mozilla Firefox can stop websites from accessing your location. It also means websites with location-based services will no longer work. That’s why it is better to spoof the location on Firefox rather than disabling it. Firefox allows you to manually change your location using its advanced settings. The steps required for this process are given below:
Step 1: Once Mozilla Firefox is open, type “about:config” and press Enter. You will see a warning screen as you modify advanced settings. You have to click on the “Accept the Risk and Continue” button to proceed further.


Step 2: First search for “Geo.enabled,” and when it appears, toggle its value from “True” to “False” to disable geolocation. To spoof your location, search for “geo.provider.network.url” and press the “Pen” icon to edit it.

Step 3: You can enter your desired location using its latitude and longitude coordinates. The format to enter your location coordinates should be:
“data:application/json,{“location”: {“lat”: LATITUDE VALUE, “lng”: LONGITUDE VALUE}, “accuracy”: 27000.0}.”
Once done, your geolocation will be changed to your desired location.

Method 3: Use The Location Guard Firefox Extension
Another way you can protect your location from websites is to use the “Location Guard “ add-on in Mozilla Firefox. It is generally recognized as an extension, also available in the Add-Ons Store of Firefox. The steps to add “Location Guard” and use it to alter your location are following:
Step 1: Click on the “Three Vertical Bars” icon from the top left corner of your Firefox and select “Add-ons and themes.” Tap “Extensions” from the left sidebar and search for “Location Guard” in the Add-Ons Store. Once located, click “Add to Firefox” to add it to your browser.

Step 2: You can choose between two options to protect your location’s privacy. Using the “Privacy Levels” option, you can select a privacy level and location range to add noise when a website tries to locate you. It stops websites from detecting your accurate location, though they can still locate the general area.

Step 3: Using its “Fixed Location” feature from the left sidebar, you can change your location. Here, select any location from the map by placing the “Marker” on it to change your browser’s location.

Part 3: How to Fake Your Location in Mozilla Firefox on Phones
It is not only on computers where you can use Firefox fake location but also on smartphones. You can easily disable or change your Firefox location on your iOS or Android device. Three different methods to disable or change the location in Mozilla Firefox are summarized below:
Method 1: Disable Geolocation Sharing on the Firefox Browser
If you use the Firefox browser on your phone, it allows you to disable your location using a couple of simple steps. Disabling location services for the Firefox browser differs on Android and iOS devices. A detailed step-by-step process for disabling location is given below for both platforms:
On Android
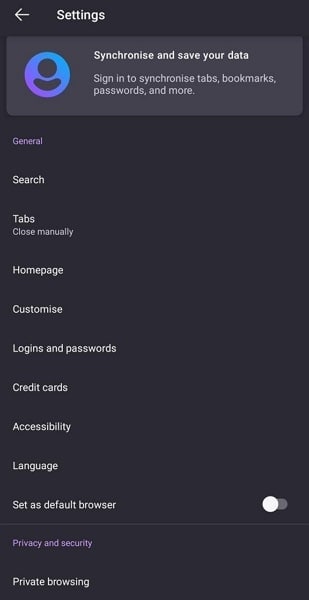
Step 1: Open the Firefox browser on your phone and press the “Three Dots” icon from the bottom right corner. Select “Settings” from the menu and navigate to the “Privacy and Security” section.
Step 2: Now, tap “Site Permissions” and select “Location.” In the “Location” option, select “Blocked” to disable the location access on the Firefox browser.

On iPhone
Step 1: On your iPhone, open “Settings” and scroll down to “Firefox.” After locating the app, select it and press “Location” on the next screen.

Step 2: In the “Location” menu, you can select “Never” to completely disable the location access for the Firefox browser. To only stop Firefox from detecting your accurate location, turn off the toggle of the “Precise Location” option.

Method 2: Spoof Your Location in Firefox Using Dr.Fone - Virtual Location
Nowadays, many websites work with the help of location-based services. Disabling geolocation from the Firefox browser means they won’t work. It means you need a tool that can change your Firefox location without affecting your favorite platforms.
Wondershare Dr.Fone - Virtual Location provides you with an excellent way to do Firefox location spoofing. You will not have to worry about websites or apps detecting your location as fake when using this tool.
Dr.Fone - Virtual Location
1-Click Location Changer for both iOS and Android
- Teleport from one location to another across the world from the comfort of your home.
- With just a few selections on your computer, you can make members of your circle believe you’re anywhere you want.
- Stimulate and imitate movement and set the speed and stops you take along the way.
- Compatible with both iOS and Android systems.
- Work with location-based apps, like Pokemon Go , Snapchat , Instagram , Facebook , etc.
3981454 people have downloaded it
Main Features of Dr.Fone - Virtual Location
- Dr.Fone - Virtual Location allows you to play location-based games. It includes games like Pokémon Go, Minecraft Earth, and Jurassic World Alive, all from the comfort of your bed.
- If you use a dating app like Tinder or Bumble, you can increase your likes and matches using this tool.
- You can bypass the geo-restriction of apps and enjoy their content with the tool’s help.
Steps Required for Spoofing Location in Firefox via Dr.Fone - Virtual Location
Using Dr.Fone- Virtual Location to spoof your location in Mozilla Firefox is simple and quick. You will need to install Dr.Fone on your computer and follow these steps for location spoofing:
Step 1: Install Dr.Fone on Your System
Download and install Dr.Fone on your computer and connect your phone to it. Access Dr.Fone, select “Virtual Location,” and click “Get Started” on the next screen to begin the process.

Step 2: Activate the Teleport Mode on Dr.Fone
After clicking “Get Started, “ a map will open where you must select your original location. It can be done using the “Center On” icon from the right sidebar. To choose your fake location, you will need to activate “Teleport Mode” from the top right corner.

Step 3: Spoof Your Location in Firefox
Enter your desired fake location in the provided space and press “Go” once the mode is activated. It will take you to the entered location, where you need to select “Move Here” to complete the process. You can confirm the location spoof by opening any location-based app on your phone.

Method 3: Change Your Location in Firefox Using ExpressVPN
Browsers like Mozilla Firefox tracks your location by using your IP address. You can use a VPN to spoof your IP location to protect your actual location from websites. ExpressVPN is a VPN that is available for both Android and iOS devices. You can use these steps to change your location using ExpressVPN:
Step 1: Install ExpressVPN on your phone and create an account for it. If you are already a user of ExpressVPN, then log in with your account.
Step 2: Select your desired fake location from the “Smart Location” tab after logging in. Once a location is selected, press “Connect” to change to the desired fake location.

Conclusion
In today’s digital world, you have to compromise your privacy to some extent. However, it doesn’t mean that you should not try to use tools available to you to protect your privacy to the limit. Dr.Fone - Virtual Location solves your concerns regarding location sharing with ease. With this tool, you can fake location in Firefox and still enjoy all the features and services offered by location-based websites and apps.
Spoofing Life360: How to Do it on Itel A70?
In an era where location tracking has become a norm, many individuals value their privacy and wish to have more control over their location data. Whether you want to maintain your privacy, simulate being in a different place, or have other reasons for altering your Life360 location, this guide is here to help. We will explore the reasons why you might consider spoofing your Life360 location and provide you with step-by-step instructions on how to fake your location on Life360 on both iPhone and Android devices. Let’s delve into the world of location spoofing and regain control of your whereabouts.
Part 1: What is Life360?
Life360 is one of the admired apps known for tracking location. The app can be used as a location-sharing platform as well as you can chat with your friends via the in-app chat feature. Here are the basics. All this app suggests is that a group of people whether an office projects group or simply a college team or maybe the family members, download and install Life360 on their phones . Mind that the app supports iPhone and Android (6 and above) devices.
After the app gets installed, you can create a circle, which in other languages simply means a group, just like you create on Facebook or WhatsApp. This circle is having members who can share the information and location accountability with each other. You can also give invitations to other users by simply taking the help of their contact numbers or email addresses.
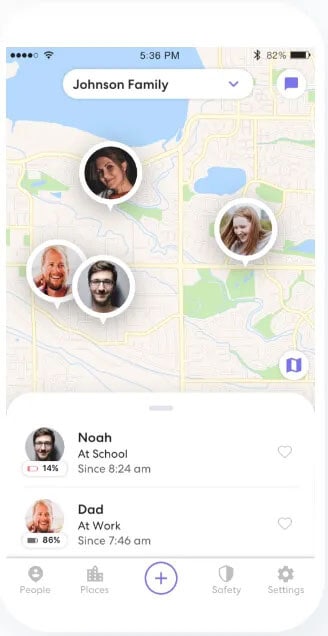
Using this app then, you can simply see the location of the other members as well as get notifications named Place Alerts. These notifications will tell you whether a user has arrived or left the selected location. This can be helpful if you are a parent and want your children to reach safely at a desired place.
Moreover, with the help of Life360, a user can easily control the ‘Check-in’ according to which he or she sends the alert to the circle to know them the exact location. You can also get to see the location history of the members to know their past locations.
Part 2: Why Do People Hate Being Tracked by Life360?
Unarguably Life360 can be considered one of the most helpful and fun apps. But the thing that sometimes or many times might bother people is the 24x7 interference with privacy.
For instance, spouses can monitor their better half and if any one of them does not understand enough, they can put various questions for your particular location and it may create chaos as a result. Not just it has a negative aspect, but it is possible that you are organizing a surprise for your partner, and for its execution; you are simply heading to a particular place. Having Life360 and being tracked by it can simply spoil the surprise as well.
For these reasons, a lot of people sum up the app as an intervention for their privacy. And for those who love their privacy, hating being tracked by Life360 is completely natural to them.
Part 3: Stop Life360 Tracking vs. Spoofing Life360
To stop or to spoof, that is the question! Yes, when you are annoyed with being tracked by Life360, you can have two options with you. Either you can stop Life360 tracking or spoof Life360 tracking. But what goes best? You might be wondering the same. For many of you, simply stopping the app and logging out from it can be a plain solution. However, we don’t support this. To us, the faking location on Life360 is much better.
- This is because firstly, if you log out and completely stop using the app, your members will get a notification for the same. To this, their curiosity will arise and none of them will stop questioning from you. To avoid this, we suggest spoofing Life360 location and not stopping it.
- Secondly, this may be fun as you can show off to your friends that you are traveling somewhere else. The list of friends may include those who are jealous of you. And this is the best way to double up their jealousy.
- Thirdly, if you tell the actual location of your device every time, many of the members, who are not having good intentions, can trace your routine and anything wrong can happen to you. Spoofing location can be a good way to trick them and catch their intentions.
Tips: Fake your Life360 location to any other address you require with Dr.Fone - Virtual Location! The Fake GPS feature for iPhone/Android prevents you from being tracked. Try it now and stop Life360 tracking you!
When it comes to learning how to trick Life360 on iOS or Android, the best option that should come to your mind should be Dr.Fone – Virtual Location (iOS/Android) . This tool comes to your rescue when you wish to change iOS location or Android location and keep your privacy on top. It helps you to simulate your movements along various routes. Apart from that, you can use it to make your virtual movement speed customized on the map. The tool is perfectly safe to use and carries a great reputation. Therefore, pondering over performance and success is not the thing you should fret upon. Here are the steps for Life360 spoofing location using Dr.Fone – Virtual Location (iOS/Android).
Step 1: Download Dr.Fone – Virtual Location (iOS/Android)
Get the tool on your computer for the process initiation. To do this, you can visit the official website and click the “Try It Free” button or you can directly click the “Download for PC” or “Download for Mac” as below. Next, install the tool and launch it. Choose the “Virtual Location” tab from the main screen.
Step 2: Get the Itel A70 device Connected
Take your iPhone now and connect it to the computer. Hit on “Get Started” once the phone is connected successfully.

Step 3: Find the Current Virtual Location
You will be shown a map on the next screen. Here, you can find your current virtual location. If the location is not showing, click on the “Current Virtual Location” icon that can be discovered at the lower right part.
Step 4: Enable Teleport Mode
You could observe the five icons at the top right of the screen. You need to click on the first icon which is to activate the Teleport Mode. After this, you can enter the place that you wish to teleport and press “Go”.

Step 5: Fake your Location on Life360
The program will make sure to recognize the place you have entered. A pop-up box will appear where the distance is mentioned. Click on “Move Here” and your location will be changed and shown as what you have selected.
Here is a video guide that helps you to fake your GPS location on Life360.
3,255,164
Part 5: How to Fake Location on Life360 Android
What if you want to know how to stop Life360 from tracking you? Well! You can go for a spoofing app for this too. There are lots of them available at the Google Play Store. For more clarity, we will help you know how you can use a spoofer app for Life360 fake location. Make sure to go along with the steps carefully.
Before you get the app worked, here is a requirement you need to follow. The requirement simply says you to enable the developer options in your Itel A70. If you know how to do it, it’s good. But if you don’t here are the steps.
Step 1: Open “Settings” in the first place and tap on “System”.
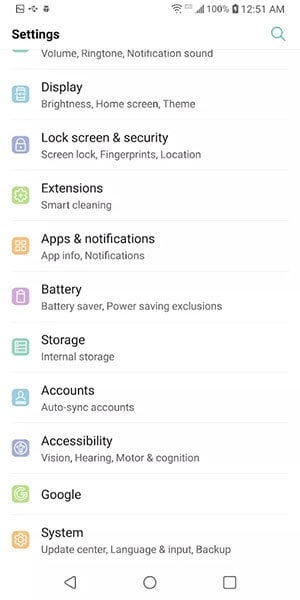
Step 2: Now, you need to go to the “About Phone” option. Followed by this, head to “Software info”.
Step 3: You will find the build number of your device here. You have to tap on it nearly 7 times.
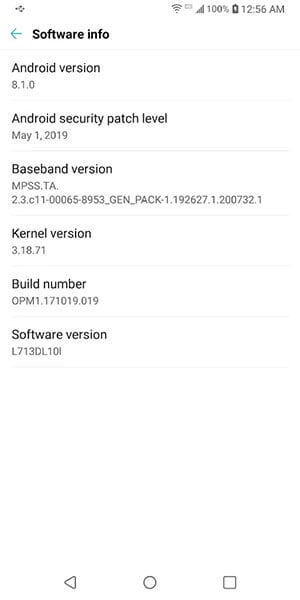
Step 4: Now, enter the lock code when asked and the developer options will be enabled.
Step by Step Guide on how to fake your location on Life360 with Android Spoofer
Step 1: Now that you have turned on the developer options, you can visit the Play Store and look for Fake GPS Location app. Install it on your phone.
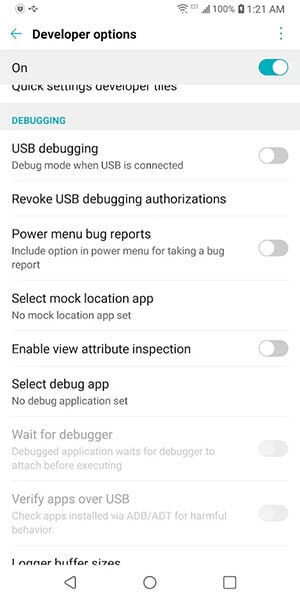
Step 2: Once installed, again go to “Settings” > “System” > “Developer Options”. Look for the “Select mock location app” and tap on it.
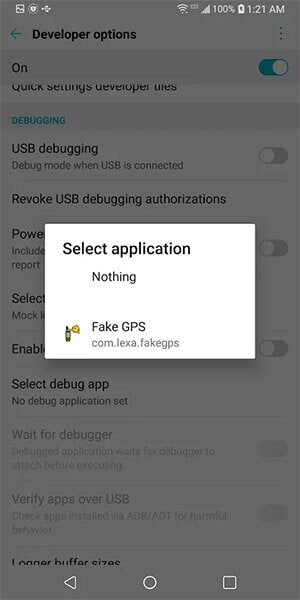
Step 3: Choose the Fake GPS app as the mock location app.
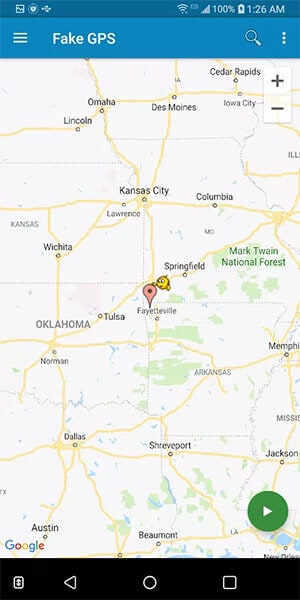
Step 4: Open the app now and choose the location you wish to fake and hit on the Play button. This was how to fake your location on Life360 on Android device.
If you want to find an easier way to fake location on life360 Android , you can also try to use Dr.Fone - Virtual Location(iOS/Android).
Dr.Fone - Virtual Location
1-Click Location Changer to Fake Your Location on Life360!
- Teleport from one location to another across the world from the comfort of your home.
- With just a few selections on your computer, you can make members of your circle believe you’re anywhere you want.
- Stimulate and imitate movement and set the speed and stops you take along the way.
- Compatible with both iOS and Android systems.
- Work with location-based apps, like Life360, Pokemon Go , Snapchat , Instagram , Facebook , etc.
3981454 people have downloaded it
Part 6: How to Stop Life360 from Tracking you
6.1 Use a burner phone
If you completely want Life360 to stop you from tracking, the very first method, and indeed a useful one is using a burner phone. This simply stands to have an extra phone with you and you can call it a burner phone. To have it, of course, you don’t have to spend much. Just have a cheap Android or iOS device with you. With this, you can easily trick your friends about your location.
- Now, all you have to do is to log out of the Life360 app from your main iPhone/Android.
- Install the app on the secondary or the burner phone and log in with the same account you were using on the original phone.
- There is nothing more to it. You can now abandon this burner phone and leave it for your work. This will make your friends or near ones think where you want them to show your location.
Note: As we have mentioned in the beginning, Life360 supports an inbuilt chat function. This is where the downside comes of having a burner phone as a solution. Putting simply, you may miss an important conversation if you have the app on a burner phone and you have left it at home when any of your friends try to chat with you. And this can cause doubts in their minds.
6.2 Pause Location Sharing in Life360 Settings
Here is another way to stop Life360 from tracking you. You can simply pause the location-sharing option from the settings. Let us mention the steps without any more discussion.
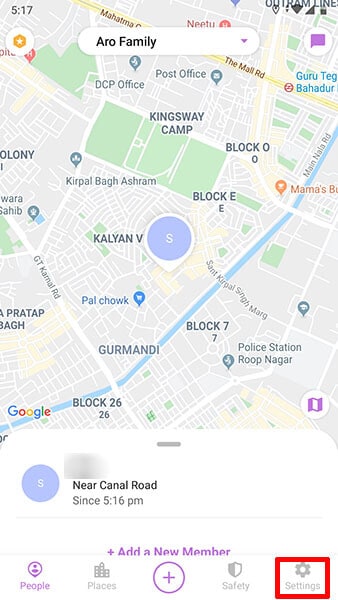
Step 1: At the lower right corner, hit on “Settings”.
Step 2: Now, go to the Circle Switcher at the top and pick out the circle you wish not to share locations with.
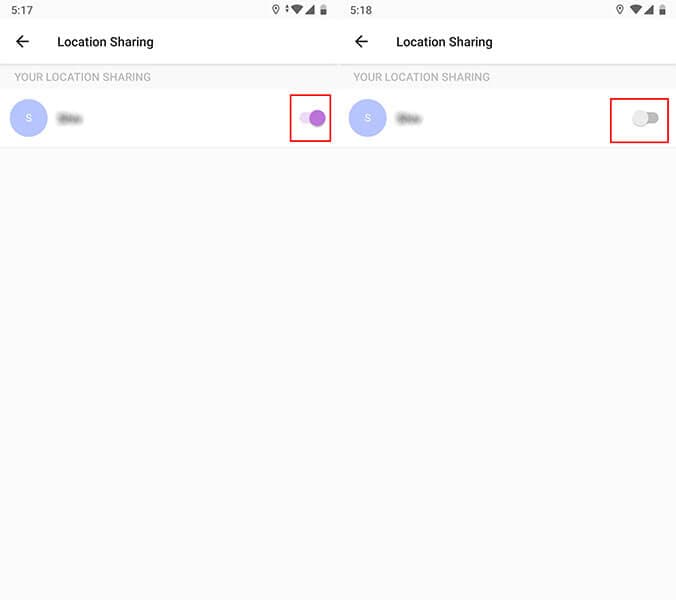
Step 3: Hit on “Location Sharing”.
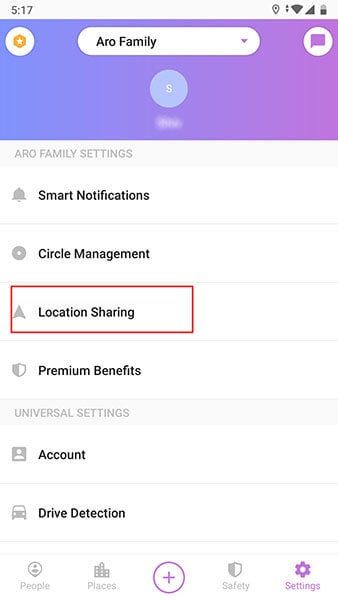
Step 4: Lastly, toggle off the slider and it will turn grey. You will see a message saying “Location Sharing Paused” and you are done.
Note: When you disable or pause location for a particular group, your location can still be tracked by other circles. Make sure to choose all or as per your needs.
FAQs
- How do I delete my history on Life360?
While it is technically possible, the method to accomplish this is improbable in yielding the intended outcome. Essentially, the sole means to entirely erase your history is by either deleting your Life360 account or departing from the Circle. Merely turning off your GPS or data connection on your phone won’t suffice.
- Can I fake location without jailbreaking my iPhone?
Yes, it’s possible to fake your location on an iPhone without jailbreaking using third-party tools like Wondershare Dr.Fone - Virtual Location. This tool allows you to simulate GPS movement and set a fake location on your iPhone without needing to jailbreak the Itel A70 device. With Dr.Fone - Virtual Location, users can easily change their GPS location to any desired spot.
- How to spoof the actual movement from one place to the fake location?
Wondershare Dr.Fone - Virtual Location is a tool that allows users to spoof actual movement from one place to another fake location on an iPhone. By using its features, users can simulate movement along a specified route, imitating real-life GPS movement from one location to another.
- If I turn off the Wi-Fi on my iPhone, will Life360 stop tracking me?
Disabling Wi-Fi on your iPhone might limit the accuracy of your location for Life360. However, Life360 can still track your location using cellular data and GPS. Turning off Wi-Fi alone might not entirely stop Life360 from tracking your location. It is especially true if other location services are still active on your device. To prevent tracking, you might need to adjust settings within your device’s location services.
Final Words
Life360 is no doubt a useful app that can help you know about the whereabouts of your near friends and family. However, when you hate being tracked on it, spoofing Life360 can come out as a great option. We discussed some helpful ways how to fake your location on Life360 in this article, including Dr.Fone - Virtual Location which allows you to manipulate your GPS location, simulate routes, and set up geofences, making it a versatile solution for your location spoofing needs. Hope you find this helpful.
8 Solutions to Fix ‘Find My Friends Location Not Available’ On Itel A70
There is no doubt that Find My Friends is an excellent application for location tracking. It allows users to track the location of their friends and family members through a variety of devices. So, when Find My Friends says the location is not available, it can be a frustrating situation. But don’t stress over this because we are here to assist you in Find My Friends not working. Go through this guide, and you’ll know what to do to take care of the problem.

Part 1: What Does “Location Not Available” Mean on Find My Friends?
When the “Location Not Available” message appears on Find My Friends, it means that you have disabled location sharing or have turned off your device’s location services. This message can also appear if your device is in an area with poor network coverage or if your device is turned off. In some cases, the message can indicate that you have logged out of your iCloud account or that there is an issue with the iCloud server.
Does “Location Not Available” mean that there is something wrong with Itel A70 ?
Not! This message does not necessarily mean that you have blocked yourself or there is something wrong with your device. If you frequently see the “Location Not Available” message, you may need to check your own device’s settings or contact your friends to confirm their location-sharing preferences.
How to distinguish “No Location Found” and “Location Not Available”?
“No Location Found” means that the Find My app is unable to locate the Itel A70 device being tracked. This can happen for a variety of reasons, such as if the Itel A70 device is turned off, not connected to the internet, or if location services are disabled.
“Location Not Available” means that the Itel A70 device is not currently sharing its location with the Find My app. This can happen if the Itel A70 device is in Airplane mode or if the user has turned off location sharing for the Find My app. It can also happen if there is a temporary issue with the iCloud servers.
In summary, “No Location Found” means the app could not locate the Itel A70 device, while “Location Not Available” means that the Itel A70 device is not currently sharing its location.
Part 2: Possible Reasons For Find My Friends Location Itel A70 Not Available
Why does Find My Friends say location not available? Before we get to the solutions, let’s explore the possible reasons behind this problem. It is apparent that when the location is not found on Find My Friends, there is an underlying problem. Here are the possible reasons that could cause this error:
- Your friend’s device has an inaccurate date
- The other device isn’t connected to a network, or it’s off
- Hide My Location feature is active on your friend’s phone
- The Location Services are also turned off on the friend’s device
- Your friend hasn’t signed in to the service
- The location of your friend is in a country or region where Apple doesn’t provide this feature
All these reasons can be the ones causing trouble on your Itel A70 and Android phones. Hence, you will have to look for some conventional methods to fix the unavailable location error.
Part 3: 8 Tips To Make “Find My Friends Location” Available
When the Find My Friends app location is not available, here are some more tips that can help get rid of this issue.
Tip 1: Check if Find My Friends is Supported in Region/Country
The foremost thing you should do when the Find My Friends location is not available is to check the region/country’s location. Apple Inc still hasn’t provided the Find My Friends feature in all countries and regions due to local laws and technical issues. So, the most plausible reason for the app not working properly is solely because it is not available in that particular country/region.
Tip 2: Quit and enable GPS or Location Services again
After verifying that the feature is available in your region, enable the GPS & Location Services. In case you’ve already enabled the feature, turn it off, quit the app, and again enable the service. It might fix the location not found on the Find My Friends issue you’ve been facing. Just open Settings > Privacy & Security > Location Services and toggle the bar to turn the feature on or off.
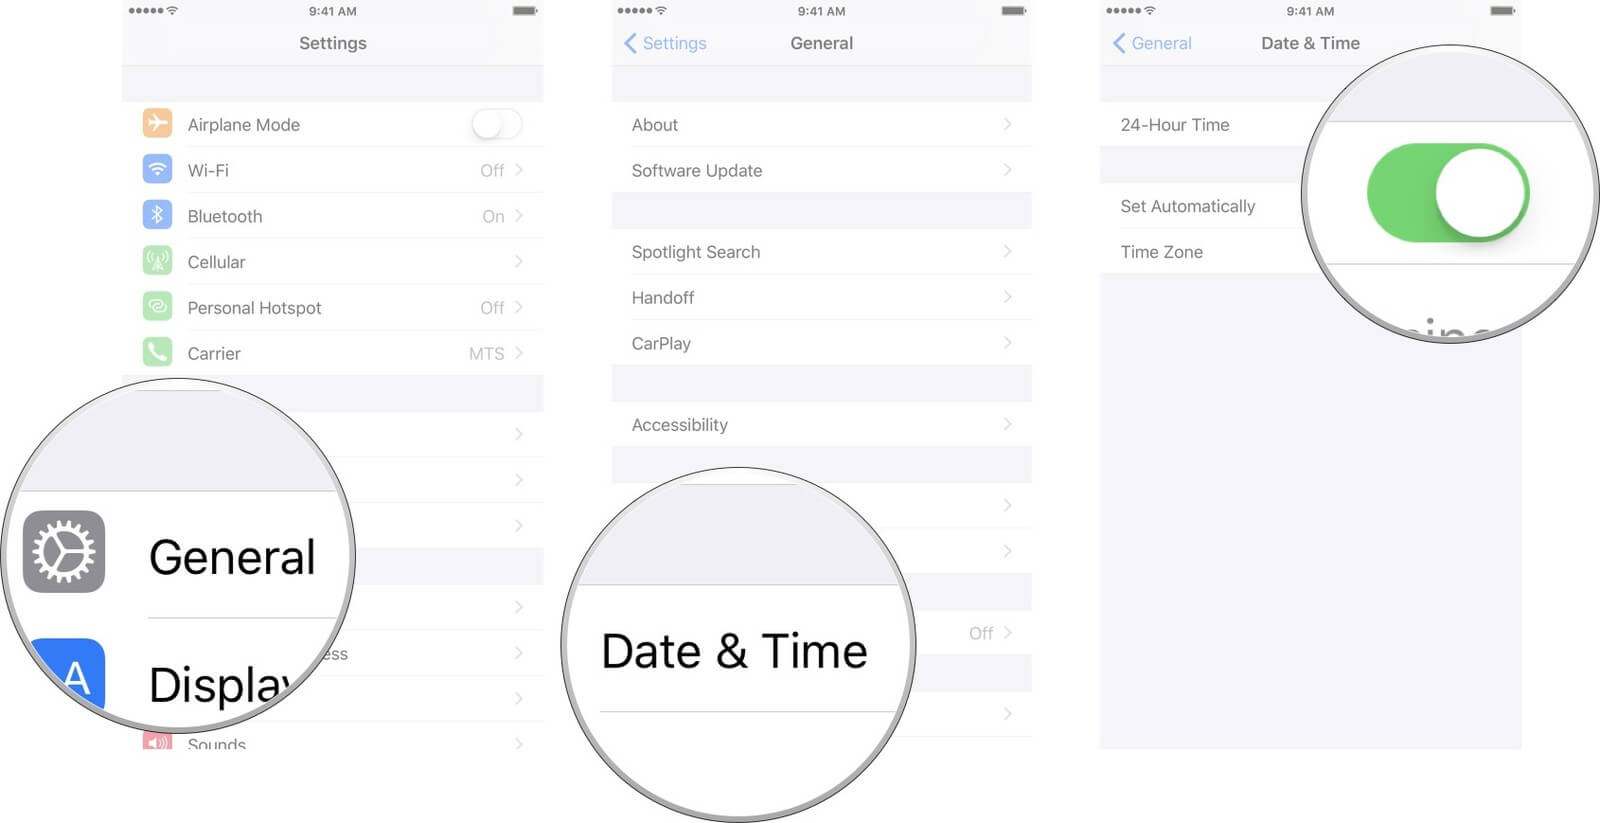
Tip 3: Adjust Itel A70 Date and Time
As we stated in the possible reasons, incorrect dates and times also result in this problem. If you have manually set the date and time, change the settings and set it to “Set Automatically” in General Settings. Hopefully, this will resolve the problem when the Find My Friends location is not available.
Tip 4: Check the Internet
Before you conclude that there is something wrong with the Find My Friends app, check your internet connection. There is a chance that location is not available on the Itel A70 because your device doesn’t have internet access. Try opening Settings > Mobile Data/Wi-Fi and turning it on and off. Alongside, make sure that you have signal strength, whether you are connecting to cellular data or a Wi-Fi network.
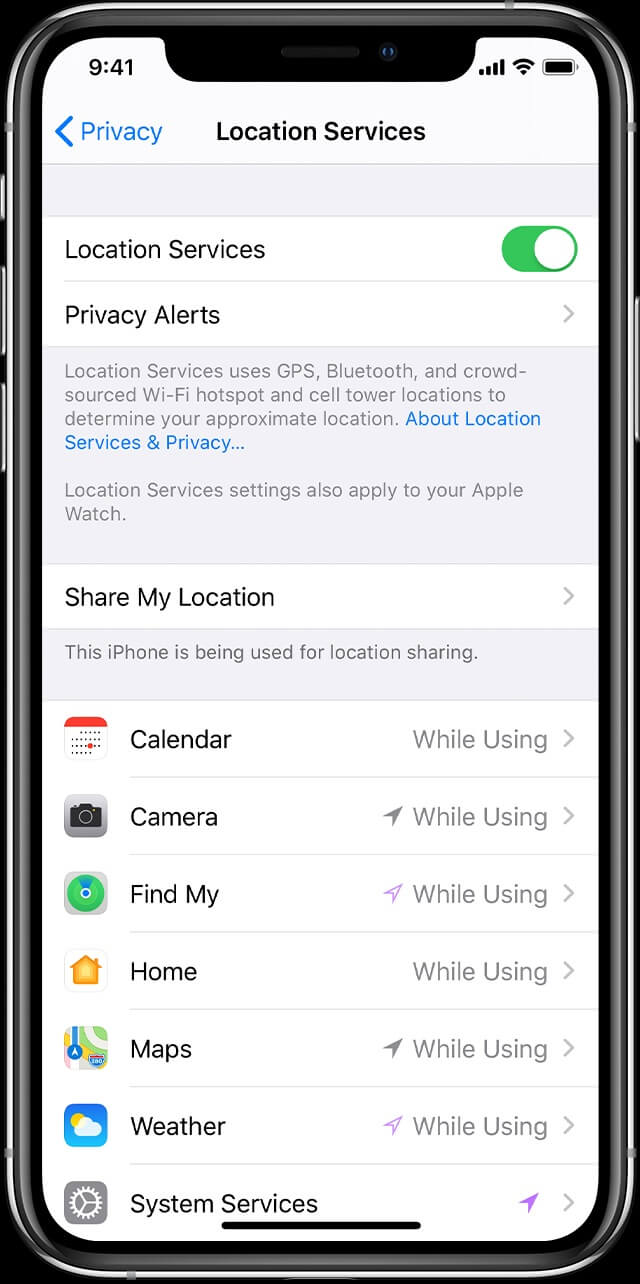
Tip 5: Enable Share My Location
Another tip to try out when your friend’s location is not available is to make certain that you’ve enabled Share My Location feature. To do this, follow the steps given below:
Step 1: For Itel A70 users: get to the “Settings” app and go to “Privacy & Security”. You will find the “Location Services” feature, click on it, and see the “Share My Location” feature.

Toggle on the option to enable it. Once the feature is enabled, your friends will see your location, and you can see theirs.
For Android users, go to “Settings” > “Additional settings” > “Privacy” > “Location”, and choose the location mode to enable it.
Tip 6: Restart the Itel A70 or Android Phones
The next tip to use when Find My Friends says location not available is restarting your phone. For most devices, the method is common. But for Itel A70 X and 11, the steps are slightly different. For other Itel A70 models, press the Power button and wait until the slider appears. For Itel A70 X and 11/12/13/14, you’ll have to hold the Volume button and the Power button together to make the slider appear on the screen.

Drag the Power slider to the right side and wait for the Itel A70 device to shut down. Wait for a minute before you restart the Itel A70 device, and hopefully, the feature will start working again as usual.
Tip 7: Check That Your Friend Has Signed into Find My Friends
Another tip that can help you resolve to Find My Friends location not available is checking that your friend has signed into the app. It is apparent that if your friend hasn’t logged into the feature, you won’t access his/her location.
Open the Find Friends app, log into it, and enable the location-sharing feature.
Tip 8: Quit Find My Friends App and Open It Again
Last but not least valuable tip to use when the Find Friends location is not available is to quit the app. There is a possibility that you’ve faced the problem only because of a momentary issue or some random glitch. Make sure that you also clear the cache memory before opening the app again. It might fix the problem entirely.
Extension: Can I send the fake location by Find Friends to others?
With Dr. Fone - Virtual Location software, you will be able to share a fake or any location you want with your friends and family. Alongside this, Dr. Fone will also pace up your movement to ensure that your friends and family members won’t find out that you share fake locations with them. The video below teaches you how to teleport your Itel A70 GPS location, and more tips and tricks can be found in the Wondershare Video Community .
Here is a video for you to learn how to fix Itel A70 Find My Friends location not available:
To use Dr.Fone - Virtual Location, here are the steps you need to follow:
Step 1: Download the virtual location app for both iOS and Android and install it on your system carefully. Then, launch the app and select the “Virtual Location” option from the toolkit.
Step 2: The next step is to set up the phone’s connection. Connect your Itel A70 and click on the “Get Started” button. Now, detect your current virtual location by clicking on the “Current Virtual Location” icon.
Step 3: Now go to the search box and type the location you want to switch to. Once the location gets detected, click on the “Move Here” option, and the location of your Itel A70 or Android phone will change to the one you specified.
As you can see, when you have Dr.Fone - Virtual Location software, you can share any location with just one click. And it would seem that your Find My Friends app is working fine.
FAQs You May Want to Know about Itel A70 Location
1. Is there a way to check if someone has stopped sharing their location with you on their Itel A70 ?
If someone stops sharing their location with you on their Itel A70 , you will see “Location Not Available” next to their name in the Find My app or Messages app. You can check the status of location sharing by tapping their name in the Find My app.
2. Can I track a stolen Itel A70 if it is turned off?
You may still be able to track a stolen Itel A70 if it is turned off using the Find My app or iCloud website. However, this depends on several factors, such as whether the Itel A70 device is connected to a Wi-Fi or cellular network, and whether the person who stole the Itel A70 device has turned off location services.
3. Can I track someone else’s Itel A70 location without their permission?
No, you cannot track someone else’s Itel A70 location without their permission. The Find My app only allows you to track the location of devices that are signed in with your Apple ID, and you need the other person’s permission to share their location with you.
4. Can I prevent someone from tracking my location?
Yes, you can take steps to prevent someone from tracking your phone’s location. Here are some measures you can consider:
- Turn off location services or GPS.
- Adjust app permissions.
- Use airplane mode.
- Use a VPN or professional location changer tool like Dr.Fone - Virtual Location to change your phone location .
- Check for spyware.
- Turn off Wi-Fi and Bluetooth.
- Review privacy settings.
- Be cautious with social media.
- Use encrypted messaging.
- Avoid public Wi-Fi.
- Clear location history.
Taking these precautions can help safeguard your phone’s location and enhance your privacy. It’s important to stay vigilant and be aware of the privacy settings and permissions on your device.
Dr.Fone - Virtual Location
1-Click Location Changer for both iOS and Android
- Teleport from one location to another across the world from the comfort of your home.
- With just a few selections on your computer, you can make members of your circle believe you’re anywhere you want.
- Stimulate and imitate movement and set the speed and stops you take along the way.
- Compatible with both iOS and Android systems.
- Work with location-based apps, like Pokemon Go , Snapchat , Instagram , Facebook , etc.
3981454 people have downloaded it
Conclusion
Hopefully, now you know “why is find my friends not working” and several ways to fix the Find Friends location not available. In this guide, we learned all these tips to make it easy for Itel A70 users to rectify the issues with the Find Friends app. Check all the tips carefully and implement them whenever you face issues like this.
Also read:
- [New] In 2024, Cultivating a Brighter Home with Outdoor Help
- [New] Navigating Twitter Video Content Flow to Facebook
- [Updated] 2024 Approved Setting the Stage for Success Zoom Configuration 101
- 10 Reasons Why You Shouldn't Add Strangers on Facebook
- 2024 Approved Pioneering VR Cycling Choose Wisely
- 3 Ways to Fake GPS Without Root On Vivo S17t | Dr.fone
- 4 Methods to Turn off Life 360 On Samsung Galaxy M14 5G without Anyone Knowing | Dr.fone
- 5 Best Route Generator Apps You Should Try On Vivo Y56 5G | Dr.fone
- 5 Hassle-Free Solutions to Fake Location on Find My Friends Of Motorola Defy 2 | Dr.fone
- 6 Ways to Change Spotify Location On Your Apple iPhone SE (2020) | Dr.fone
- A Detailed Guide on Faking Your Location in Mozilla Firefox On Nokia C32 | Dr.fone
- A Detailed VPNa Fake GPS Location Free Review On Asus ROG Phone 8 Pro | Dr.fone
- Android Safe Mode - How to Turn off Safe Mode on Poco C51? | Dr.fone
- In 2024, How to Use Phone Clone to Migrate Your Xiaomi 14 Data? | Dr.fone
- The Ultimate Fix: Tackling the Missing CPU Driver Challenge on a Windows 10 Computer
- What Pokémon Evolve with A Dawn Stone For Samsung Galaxy A54 5G? | Dr.fone
- Title: A Detailed Guide on Faking Your Location in Mozilla Firefox On Itel A70 | Dr.fone
- Author: Mia
- Created at : 2024-09-30 16:51:09
- Updated at : 2024-10-01 16:33:34
- Link: https://location-fake.techidaily.com/a-detailed-guide-on-faking-your-location-in-mozilla-firefox-on-itel-a70-drfone-by-drfone-virtual-android/
- License: This work is licensed under CC BY-NC-SA 4.0.