
8 Solutions to Fix Find My Friends Location Not Available On Vivo T2 Pro 5G | Dr.fone
8 Solutions to Fix ‘Find My Friends Location Not Available’ On Vivo T2 Pro 5G
There is no doubt that Find My Friends is an excellent application for location tracking. It allows users to track the location of their friends and family members through a variety of devices. So, when Find My Friends says the location is not available, it can be a frustrating situation. But don’t stress over this because we are here to assist you in Find My Friends not working. Go through this guide, and you’ll know what to do to take care of the problem.

Part 1: What Does “Location Not Available” Mean on Find My Friends?
When the “Location Not Available” message appears on Find My Friends, it means that you have disabled location sharing or have turned off your device’s location services. This message can also appear if your device is in an area with poor network coverage or if your device is turned off. In some cases, the message can indicate that you have logged out of your iCloud account or that there is an issue with the iCloud server.
Does “Location Not Available” mean that there is something wrong with Vivo T2 Pro 5G ?
Not! This message does not necessarily mean that you have blocked yourself or there is something wrong with your device. If you frequently see the “Location Not Available” message, you may need to check your own device’s settings or contact your friends to confirm their location-sharing preferences.
How to distinguish “No Location Found” and “Location Not Available”?
“No Location Found” means that the Find My app is unable to locate the Vivo T2 Pro 5G device being tracked. This can happen for a variety of reasons, such as if the Vivo T2 Pro 5G device is turned off, not connected to the internet, or if location services are disabled.
“Location Not Available” means that the Vivo T2 Pro 5G device is not currently sharing its location with the Find My app. This can happen if the Vivo T2 Pro 5G device is in Airplane mode or if the user has turned off location sharing for the Find My app. It can also happen if there is a temporary issue with the iCloud servers.
In summary, “No Location Found” means the app could not locate the Vivo T2 Pro 5G device, while “Location Not Available” means that the Vivo T2 Pro 5G device is not currently sharing its location.
Part 2: Possible Reasons For Find My Friends Location Vivo T2 Pro 5G Not Available
Why does Find My Friends say location not available? Before we get to the solutions, let’s explore the possible reasons behind this problem. It is apparent that when the location is not found on Find My Friends, there is an underlying problem. Here are the possible reasons that could cause this error:
- Your friend’s device has an inaccurate date
- The other device isn’t connected to a network, or it’s off
- Hide My Location feature is active on your friend’s phone
- The Location Services are also turned off on the friend’s device
- Your friend hasn’t signed in to the service
- The location of your friend is in a country or region where Apple doesn’t provide this feature
All these reasons can be the ones causing trouble on your Vivo T2 Pro 5G and Android phones. Hence, you will have to look for some conventional methods to fix the unavailable location error.

Part 3: 8 Tips To Make “Find My Friends Location” Available
When the Find My Friends app location is not available, here are some more tips that can help get rid of this issue.
Tip 1: Check if Find My Friends is Supported in Region/Country
The foremost thing you should do when the Find My Friends location is not available is to check the region/country’s location. Apple Inc still hasn’t provided the Find My Friends feature in all countries and regions due to local laws and technical issues. So, the most plausible reason for the app not working properly is solely because it is not available in that particular country/region.
Tip 2: Quit and enable GPS or Location Services again
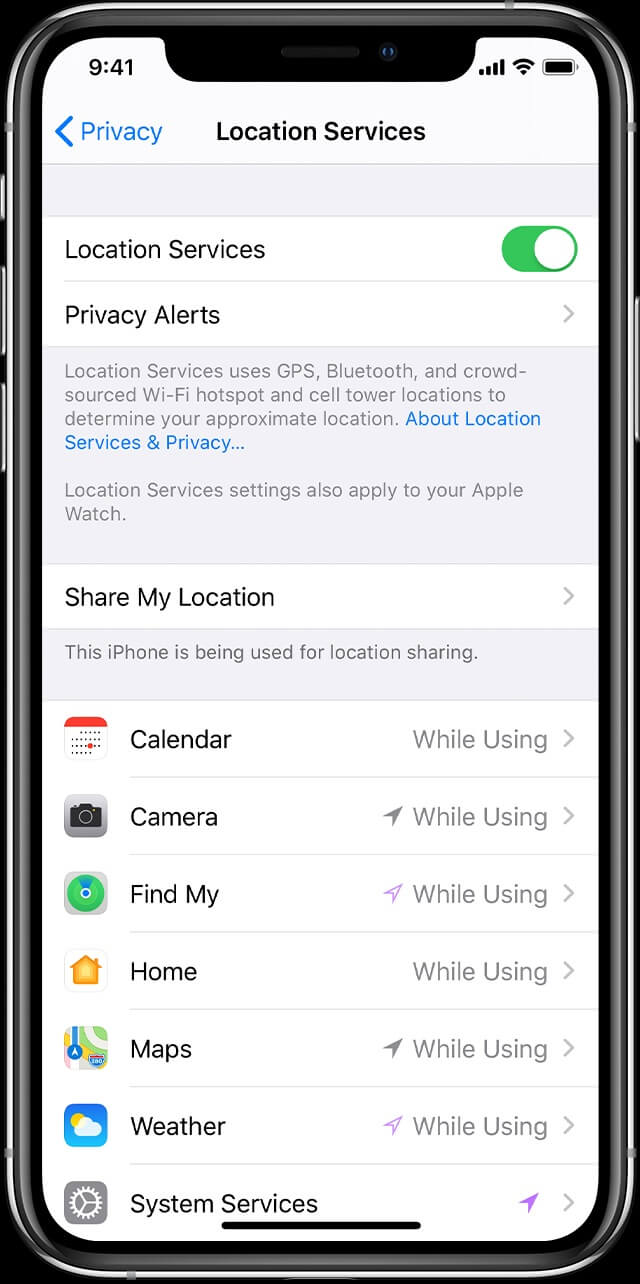
After verifying that the feature is available in your region, enable the GPS & Location Services. In case you’ve already enabled the feature, turn it off, quit the app, and again enable the service. It might fix the location not found on the Find My Friends issue you’ve been facing. Just open Settings > Privacy & Security > Location Services and toggle the bar to turn the feature on or off.
Tip 3: Adjust Vivo T2 Pro 5G Date and Time
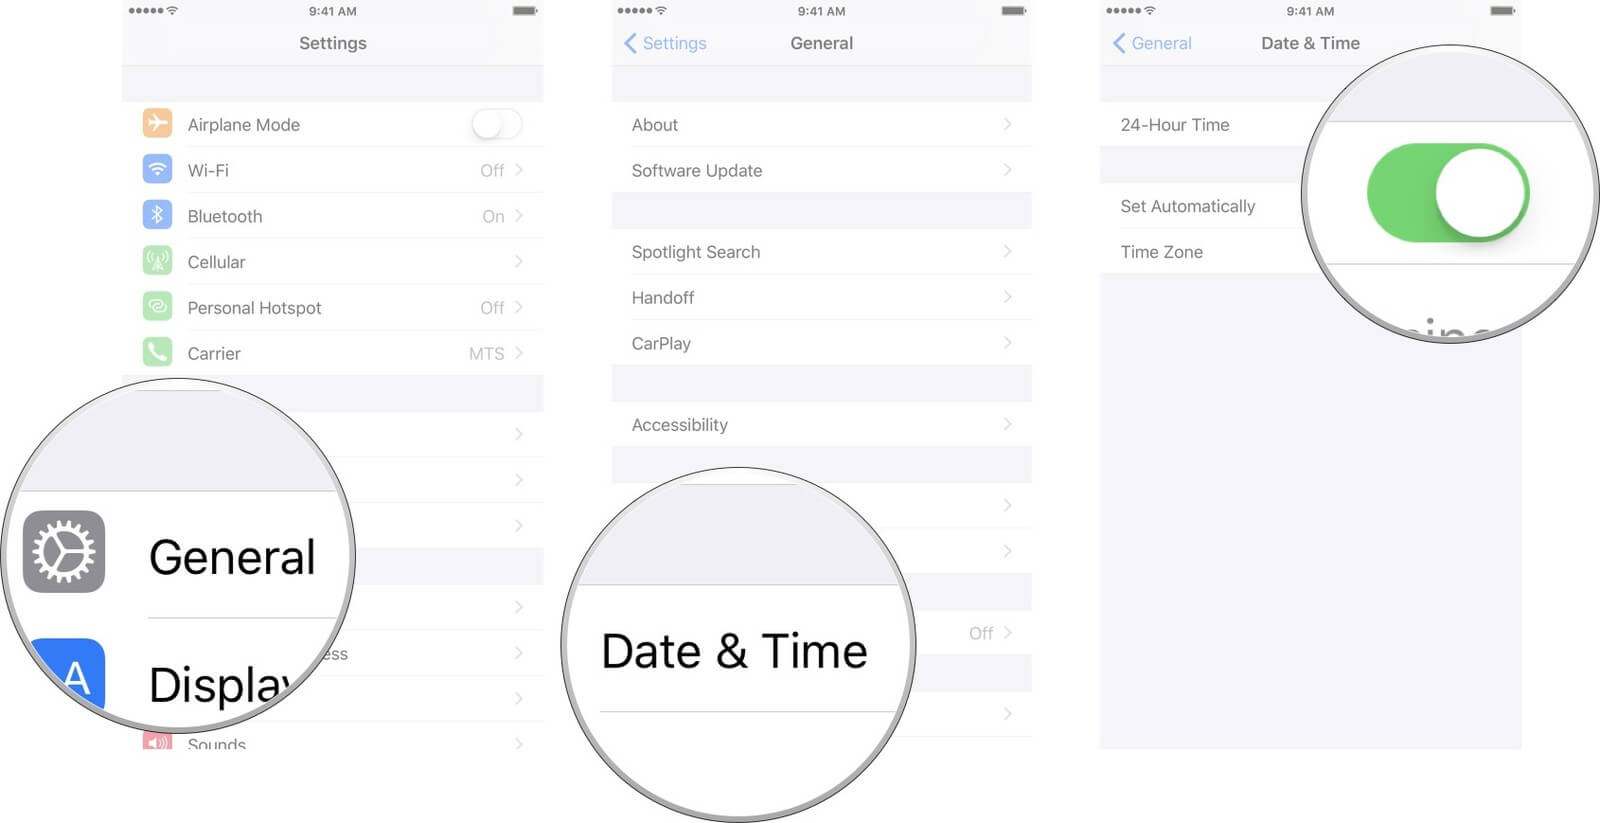
As we stated in the possible reasons, incorrect dates and times also result in this problem. If you have manually set the date and time, change the settings and set it to “Set Automatically” in General Settings. Hopefully, this will resolve the problem when the Find My Friends location is not available.
Tip 4: Check the Internet
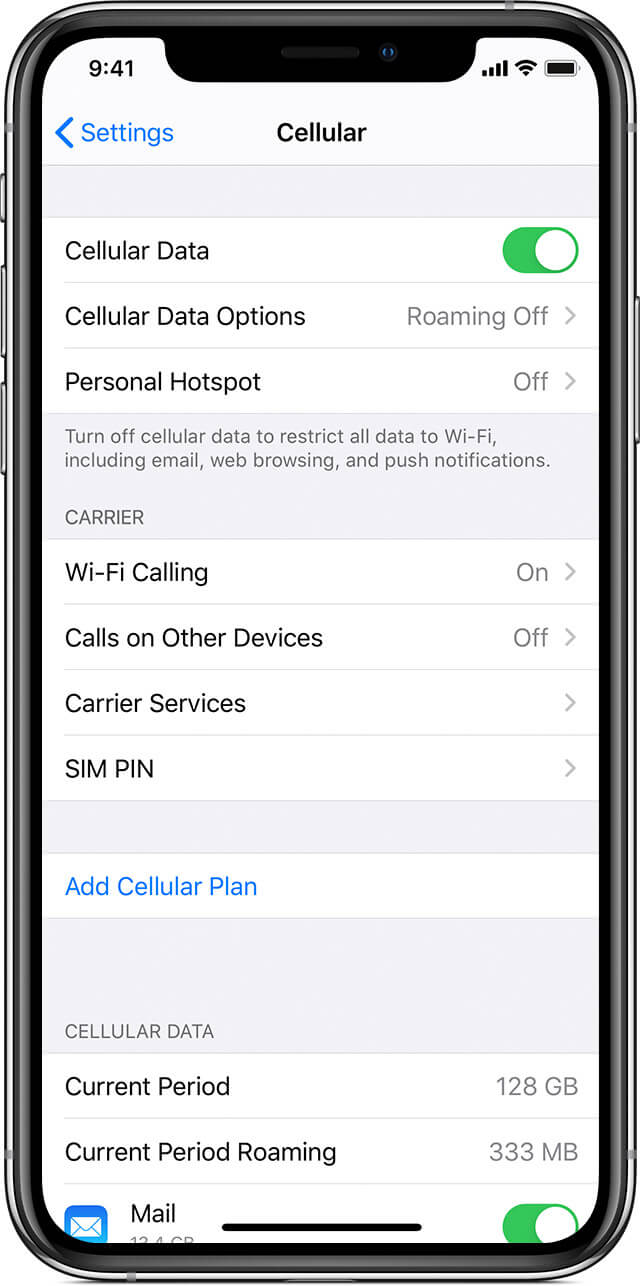
Before you conclude that there is something wrong with the Find My Friends app, check your internet connection. There is a chance that location is not available on the Vivo T2 Pro 5G because your device doesn’t have internet access. Try opening Settings > Mobile Data/Wi-Fi and turning it on and off. Alongside, make sure that you have signal strength, whether you are connecting to cellular data or a Wi-Fi network.
Tip 5: Enable Share My Location
Another tip to try out when your friend’s location is not available is to make certain that you’ve enabled Share My Location feature. To do this, follow the steps given below:
Step 1: For Vivo T2 Pro 5G users: get to the “Settings” app and go to “Privacy & Security”. You will find the “Location Services” feature, click on it, and see the “Share My Location” feature.

Toggle on the option to enable it. Once the feature is enabled, your friends will see your location, and you can see theirs.
For Android users, go to “Settings” > “Additional settings” > “Privacy” > “Location”, and choose the location mode to enable it.
Tip 6: Restart the Vivo T2 Pro 5G or Android Phones
The next tip to use when Find My Friends says location not available is restarting your phone. For most devices, the method is common. But for Vivo T2 Pro 5G X and 11, the steps are slightly different. For other Vivo T2 Pro 5G models, press the Power button and wait until the slider appears. For Vivo T2 Pro 5G X and 11/12/13/14, you’ll have to hold the Volume button and the Power button together to make the slider appear on the screen.

Drag the Power slider to the right side and wait for the Vivo T2 Pro 5G device to shut down. Wait for a minute before you restart the Vivo T2 Pro 5G device, and hopefully, the feature will start working again as usual.
Tip 7: Check That Your Friend Has Signed into Find My Friends
Another tip that can help you resolve to Find My Friends location not available is checking that your friend has signed into the app. It is apparent that if your friend hasn’t logged into the feature, you won’t access his/her location.
Open the Find Friends app, log into it, and enable the location-sharing feature.
Tip 8: Quit Find My Friends App and Open It Again
Last but not least valuable tip to use when the Find Friends location is not available is to quit the app. There is a possibility that you’ve faced the problem only because of a momentary issue or some random glitch. Make sure that you also clear the cache memory before opening the app again. It might fix the problem entirely.
Extension: Can I send the fake location by Find Friends to others?
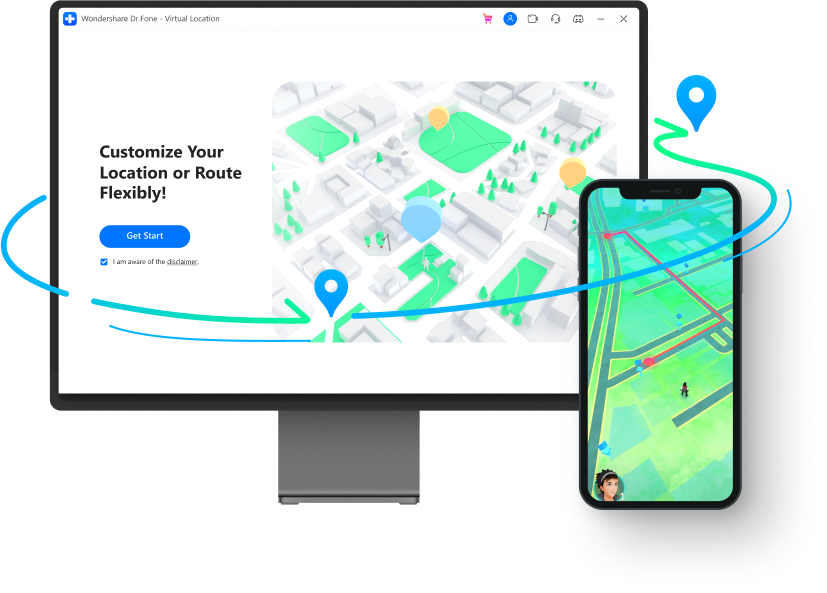
With Dr. Fone - Virtual Location software, you will be able to share a fake or any location you want with your friends and family. Alongside this, Dr. Fone will also pace up your movement to ensure that your friends and family members won’t find out that you share fake locations with them. The video below teaches you how to teleport your Vivo T2 Pro 5G GPS location, and more tips and tricks can be found in the Wondershare Video Community .
Here is a video for you to learn how to fix Vivo T2 Pro 5G Find My Friends location not available:
To use Dr.Fone - Virtual Location, here are the steps you need to follow:
Step 1: Download the virtual location app for both iOS and Android and install it on your system carefully. Then, launch the app and select the “Virtual Location” option from the toolkit.

Step 2: The next step is to set up the phone’s connection. Connect your Vivo T2 Pro 5G and click on the “Get Started” button. Now, detect your current virtual location by clicking on the “Current Virtual Location” icon.

Step 3: Now go to the search box and type the location you want to switch to. Once the location gets detected, click on the “Move Here” option, and the location of your Vivo T2 Pro 5G or Android phone will change to the one you specified.

As you can see, when you have Dr.Fone - Virtual Location software, you can share any location with just one click. And it would seem that your Find My Friends app is working fine.
FAQs You May Want to Know about Vivo T2 Pro 5G Location
1. Is there a way to check if someone has stopped sharing their location with you on their Vivo T2 Pro 5G ?
If someone stops sharing their location with you on their Vivo T2 Pro 5G , you will see “Location Not Available” next to their name in the Find My app or Messages app. You can check the status of location sharing by tapping their name in the Find My app.
2. Can I track a stolen Vivo T2 Pro 5G if it is turned off?
You may still be able to track a stolen Vivo T2 Pro 5G if it is turned off using the Find My app or iCloud website. However, this depends on several factors, such as whether the Vivo T2 Pro 5G device is connected to a Wi-Fi or cellular network, and whether the person who stole the Vivo T2 Pro 5G device has turned off location services.
3. Can I track someone else’s Vivo T2 Pro 5G location without their permission?
No, you cannot track someone else’s Vivo T2 Pro 5G location without their permission. The Find My app only allows you to track the location of devices that are signed in with your Apple ID, and you need the other person’s permission to share their location with you.
4. Can I prevent someone from tracking my location?
Yes, you can take steps to prevent someone from tracking your phone’s location. Here are some measures you can consider:
- Turn off location services or GPS.
- Adjust app permissions.
- Use airplane mode.
- Use a VPN or professional location changer tool like Dr.Fone - Virtual Location to change your phone location .
- Check for spyware.
- Turn off Wi-Fi and Bluetooth.
- Review privacy settings.
- Be cautious with social media.
- Use encrypted messaging.
- Avoid public Wi-Fi.
- Clear location history.
Taking these precautions can help safeguard your phone’s location and enhance your privacy. It’s important to stay vigilant and be aware of the privacy settings and permissions on your device.
Dr.Fone - Virtual Location
1-Click Location Changer for both iOS and Android
- Teleport from one location to another across the world from the comfort of your home.
- With just a few selections on your computer, you can make members of your circle believe you’re anywhere you want.
- Stimulate and imitate movement and set the speed and stops you take along the way.
- Compatible with both iOS and Android systems.
- Work with location-based apps, like Pokemon Go , Snapchat , Instagram , Facebook , etc.
3981454 people have downloaded it
Conclusion
Hopefully, now you know “why is find my friends not working” and several ways to fix the Find Friends location not available. In this guide, we learned all these tips to make it easy for Vivo T2 Pro 5G users to rectify the issues with the Find Friends app. Check all the tips carefully and implement them whenever you face issues like this.
Full Guide to Fix iToolab AnyGO Not Working On Vivo T2 Pro 5G
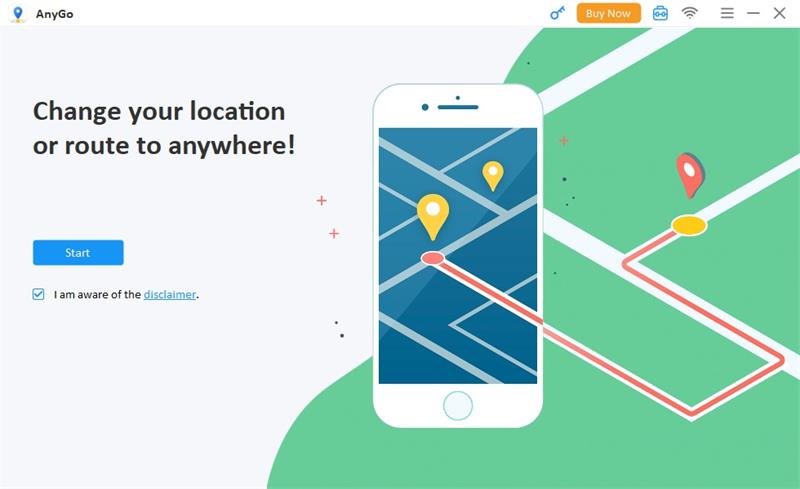
If you want to go anywhere in the world without moving an inch from your home and wondering how to change location on your iPhone, then iToolab AnyGO is the app for you. Not literally, but it allows you to teleport your current location anywhere around the globe. It is considered the most famous and widely used GPS spoofing locator, which offers various options than merely faking your current location.
It also allows you to simulate GPS movement, which helps you play games after importing GPX route files. You can use a joystick or keyboard to simulate easily anywhere. But users of this app are experiencing some technical problems and improper functionality and hence can not seem to get on with it. And if you are among those unlucky guys and wondering if iToolab AnyGO not working, how to fix it? Then you’re at the right place.
In this article, you will get to know exactly how to fake location on iPhone and fix iToolab AnyGO when it is not working. Though there are numerous problems that users are complaining about, here you will know the most common problems faced by many users. So stay tuned.
Part 1. What is iToolab AnyGo?
This app is a GPS spoofing app that changes location on iPhone anywhere around the globe. But the fun part with this app is that now you can gain access to the location-based games and apps that you normally could not access. This opens gates to endless possibilities where you can watch any TV show, download any location-based app, and play games. In short, this app removes any geo-based restrictions on you without jailbreaking your phone.
Here are some prominent pros of the app in a nutshell:
- Spoof GPS location on your iPad/iPhone with jump mode.
- Change locations multiple times.
- Works perfectly with geo-based games like Pokemon GO.
- Play AR games naturally.
- Enable 2-spot or multi-spot movement or follow the GPX route.
And here are some of the drawbacks:
- It is difficult to change locations multiple times and your account may also suspend.
Part 2. How to fix the iToolab AnyGo not working issue?
Issue 1: The map does not appear in the program
First, check your network connection if iToolab AnyGO doesn’t show on the map. Then, if the internet is available, download the latest iToolab AnyGO. You can check it out by clicking the menu and hitting the “Check for updates” button. Alternatively, you can uninstall and re-install AnyGO to acquire the latest version.
Issue 2: iPhone/iPad unable connecting AnyGO
Follow these step-by-step guides if your iPhone/iPad cannot connect with iToolab AnyGO.
- Try to re-plug and unplug your device, and connect again after restarting the program.
- Also, try different USB ports and original USB cables, as maybe there’s an issue with the USB connection.
- Also, make sure that your computer and your device are correctly connected. If not, then iTunes cannot detect your device.
Note: Make sure that your iOS version should be compatible with AnyGO. iOS 8 or the latest versions ensure compatibility.
Issue 3: AnyGO repeatedly crashes
If this issue still exists, try to re-open the program again and again. If crashing continues, send program log files to the support team.
For Mac:
Head to the top menu of Mac and click Go, then click the Options button over the keyboard. A drop-down menu will appear with library options. Go to library>logs>Diagnostic reports and find log file”iToolab AnyGO” for mac crash.
For Windows:
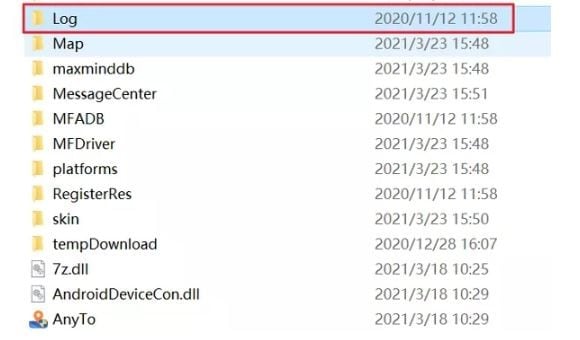
On AnyGO, Go to the installation path. Locate the log folder and compress it before sending it to the support team.
Tips: iToolab AnyGo still not working? Switch to Dr.Fone - Virtual Location for seamless and reliable location simulation. Say goodbye to issues and enjoy hassle-free location control. Try It now!
Part 3. Best iToolab AnyGo Alternative Program You Can Use in 2024
If you are searching for an alternative app to the iToolab AnyGo, look no further and check out the Dr.Fone - Virtual Location . It is similar to other GPS spoofing apps but promises a smooth, natural, and realistic simulation of any GPS location.
Games are always fun playing with joysticks. And if you play games like Pokemon GO with it, you will experience better and seamless control over your Pokemon character in the simulation.
The app has a low detection rate which prevents you from jailbreaking and avoids getting your account banned. The developers are always alert and constantly updating the app, so you get the most benefit from Dr. Fone Virtual Location. In addition, it is highly compatible with devices running the latest version, so you do not have to worry if the app will work on your device if you are running iOS 17 or Android 12 or later versions.
One great feature that Dr. Fone Virtual Location consists of is sharing your fake location with your family. So you can play pranks with them and have a great time. You can also connect with new friends and get to know their whereabouts.
So much of the talk. If you are wondering how to use Dr.Fone - Virtual Location app? Here’s what you should know. Follow the below step-by-step guide:
How to use the joystick for flexible and smooth GPS control
- The joystick feature is located in the teleport option at the upper-right corner in the 5th location.
How to simulate movement along the route using 2 spot location
- Go to “One-Stop mode” at the corner on top.
- Select the spot on the map you wish to go. The pop-up will tell you how far it is.
- Drag the slider to select how fast you wish to move. Choose between cycling, walking, and driving. Let’s take cycling for example.
- Enter a number to decide how many times you want to cycle between the two locations. Now click “Move Here”. Your character will start moving.
How to export and import GPX location
- Click the export button to store the path as a GPX file
- Import the shared GPX file to your Dr. Fone Virtual Location.
- Download it from another website. Now click the “Open” button.
- Wait some time to complete the import process. Once done, it is now ready for use.
How to teleport anywhere around the globe
Firstly download the Dr. Fone Virtual Location app. Though the app’s current version has an old interface, the functionality is cleared from any glitches. The latest interface will soon be available. Now click on the “Virtual Location” from the options and connect your Android/ iPhone to your computer, and hit “Get Started”.
Now in the window, find your existing location on your map with the help of the “center on” icon, which is located on the right sidebar. You will go to your current location upon clicking.
Now hit “teleport mode” at the top right. Enter your desired teleport located and hit the “Go” icon. Let’s visit Rome for this example.
You have successfully teleported to Rome. Click “Move Here”
Now your location is fixed to Rome.
How to add your route as a favorite
- On your virtual location screen, click on the five-star beside the route and add it to your favorite.
- Once you have added, hit the five-star icon again at the right-sidebar and locate the route you wish to use. Now hit the “Move” button and start walking along your favorite route again.
How to simulate movement along the route using multi-spot
- Choose multi-spot mode at the top right corner.
- The left sidebar tells how far it will travel to reach the location. Now set the moving speed and specify the number of times to cycle between the locations. Now click “Start Moving”.
You can watch the video below to fix iToolab AnyGo not working
Conclusion
If you are experiencing issues in the app and thinking iToolab AnyGo not working how to fix it? This is the answer. But if you are looking for an alternative, look no other than Dr.Fone - Virtual Location (iOS/Android). The app is very easy to use, teleports you in one click, and lets you use any location-based apps and games that are otherwise impossible to play.
 safe & secure
How to use Snapchat Location Spoofer to Protect Your Privacy On Vivo T2 Pro 5G?
People are very happy about Snapchat’s new Snap map feature. It lets you update your location on a map, so that you can know who else (in your friends circle) is in the same concert or attending the same seminar. Whenever you add a post to your stories, your bitmoji appears on the geo-tagged location on the map.
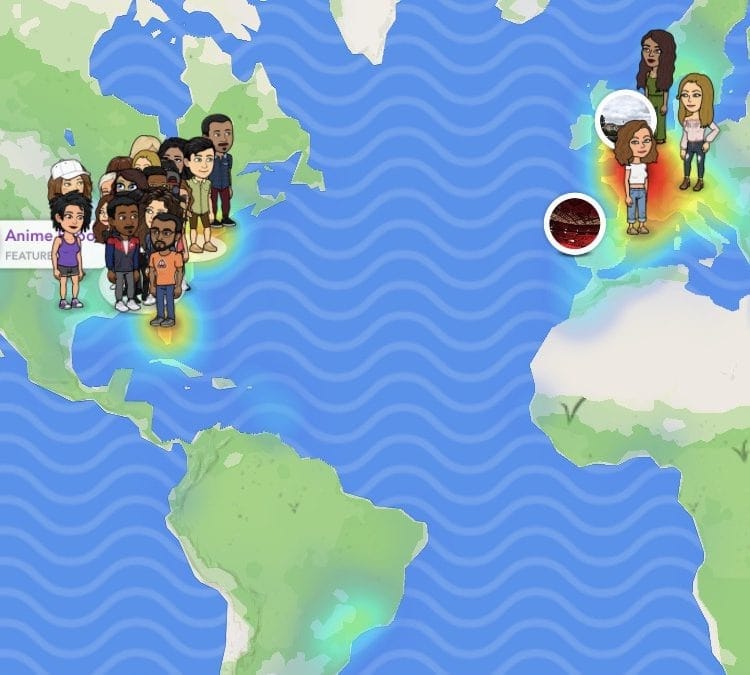
This feature was good news for people who were wondering how to share location on snapchat with their friends. But there is more to this than your eyes are seeing. Even when you don’t upload any posts to the stories, snapchat is still revealing your location to all your friends, whether you want it or not. Everytime you open the app, your location is being compromised. You just need to agree to share your location once, and Snapchat takes it as an invite to share your location every single time you send a snap or simply open the app to look at others’ snaps.
This is very dangerous when you have unknown people on your snap friends list. You must have accidentally accepted requests from people who have similar names to your friends? You don’t really know the identity of the person unless they snap their faces to you. In the worst case scenario, you can also have an obsessed stalker who was just waiting for this chance to track you down. The possibilities are endless. So, how to hide your snapchat location from the others on the internet? Our guide will teach you exactly that!
Part 1: Can we Hide Location on Snapchat?
The first thing that comes to our mind whenever we think about fake gps location snapchat is a VPN. But keeping these virtual network apps and spoofing apps aside, is it possible to hide our location by taking advantage of the existing settings on the app?
Yes, Absolutely!
There are a few tricks that you can use to hide your location from your friends or anyone who you have on your Snap List.
Ghost Mode: The word ‘Ghost’ was never this sweet. The snapchat fake location saves a lot of trouble. However, if there is no location at all, that is a huge advantage too! You can literally disappear off of the map when you activate the Ghost mode on Snapchat. Instead of a snapchat spoof, you are completely removing your traces from the Snapmap. This is how you enable this very useful setting -
Step 1: If you are someone who maintains the snap streak regularly, then it is no problem for you to track down the camera screen. Open the camera screen on your phone.
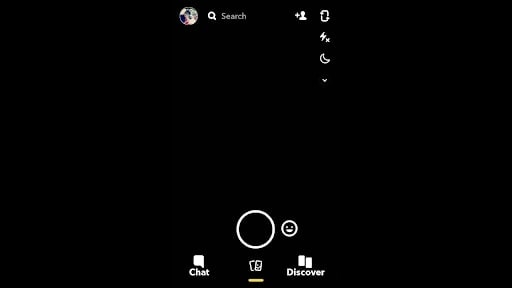
Step 2: On the top-left corner, you will find your bitmoji that will lead you to your Snap profile. Click on your bitmoji.
![]()
Step 3: The profile page will appear. Scroll to the bottom and you will find the Snapmap option there. Right below it will be a small arrow pointing to the right. Instead of clicking on the map, tap on thi arrow.
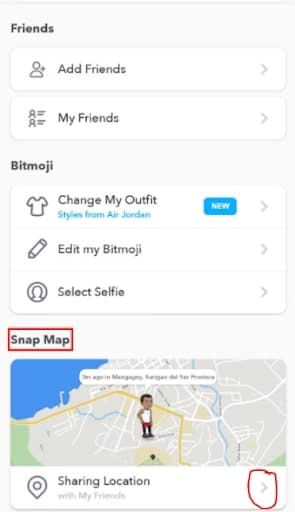
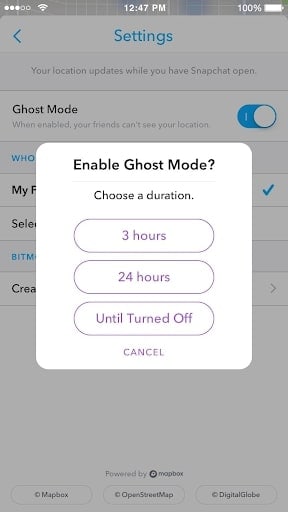
Step 4: The Map and ‘My Location’ settings will open. There you will find the Ghost Mode. Enable the setting and you will see a dialogue box asking you to choose the duration of the Ghost Mode. Depending on what you want, choose your location.
If you still don’t trust this Ghost mode, the next trick will be very useful for you. Not just Snapchat, any app won’t be able to track down your exact location when you follow it.
Turn Off GPS Permissions on your phone
If you completely turn off the GPS Permissions on your phone, then no app can access your location even if you are connected to the internet. This might hinder the performance of a few apps but that is the risk that you must take to safeguard your privacy. The procedure to Turn off the GPS will differ from Android to iPhone. We have listed the most easy ways to turn off the location services on your phones.
Android
The easiest method is to go with the Notification tray that is present on top of the Android device. That is, when you look at your Android screen, you will see the notification tray on the top.
Step 1: Swipe down the notification tray and you will find several options. One of them is the ‘Location’ icon.
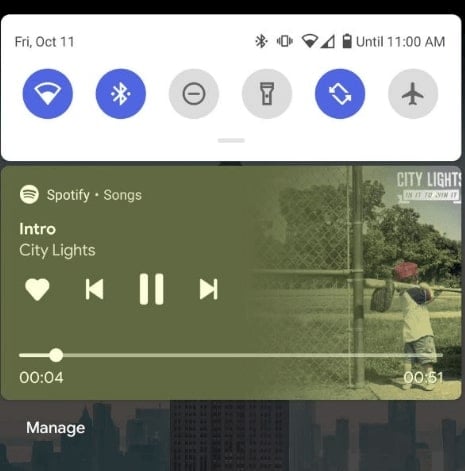
Step 2: The ‘Location’ icon is shaped like a geo-coordinate pin and remains in grey color when switched off and Blue color when turned on. Tap on the icon to on/off.

iPhone
To turn off the Location on your iPhone device,
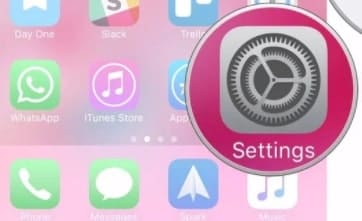
Step 1: Go to the ‘Settings’ option from your iPhone device’s Menu.
Step 2: Search for the ‘Privacy’ option and tap on it.
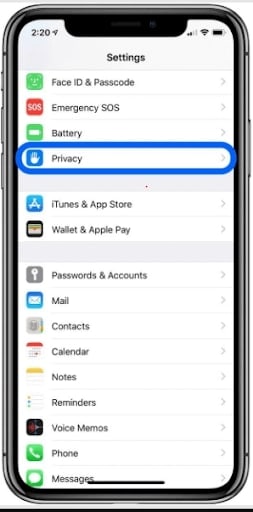
Step 3: In the next page that appears, you will find the ‘Location Services’. If we are not wrong, it is usually the first option on the page that opens up.
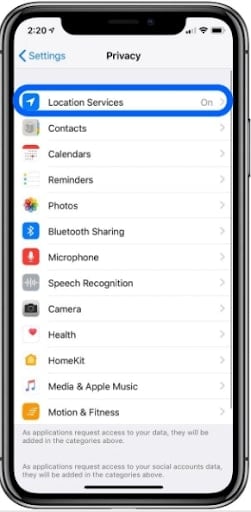
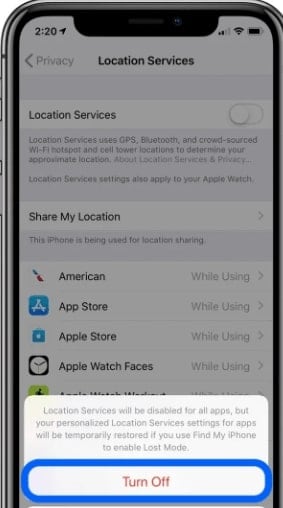
Step 4: Shift the toggle and turn off the Location Services. If you want, you can also disable location services individually for Snapchat only.
These are the simple ways in which you can prevent snapchat from spying on your location. You must be knowing how to send location on snapchat through chats - even this won’t be possible once you completely turn off the GPS of your devices.
Part 2: How to Spoof Location on Snapchat
If you are wondering how to fake location on snapchat, then the Snapchat location spoofer is one of the best options. You won’t find a specific software designed exclusively for Snapchat but Wondershare’s Dr. Fone Virtual Location spoofer will help you hide your real location on social media apps. This is how you use the application.
Dr. Fone - Virtual Location (iOS)
Step 1: Download the Dr.Fone Virtual Location Spoofer on your PC and launch it. You will find several options on the page. Go for ‘Virtual Location’.
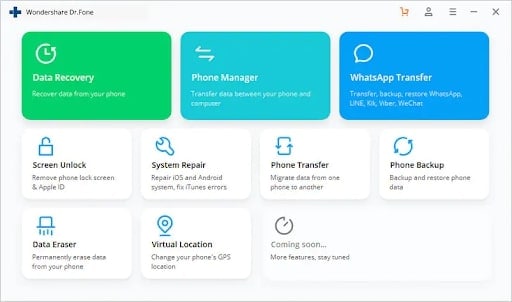
Step 2: Now connect Your Vivo T2 Pro 5G to your PC and go with the ‘Get Started’ option.

Step 3: The world map with your current location will show up on the page. The ‘Teleport mode’ is the third icon on the top-right corner of the page. Click on it and enter your new location in the search box.

Step 4: Once you’ve decided with your final virtual location to fake gps for snapchat, then click on ‘Move Here’. New location will update in your phone and Snapchat will detect it too.
One of the advantages of using a location spoofer is that - your new location will reflect in all social media applications. Even your regular apps will detect the change and note it. So, it becomes hard to know if the change is fake or real.
VPN Service - NordVPN
The Virtual private Network services hide your IP, mask your identity and since you will be changing your server, they spoof location on snapchat too. NordVPN is one of the most hailed VPNs and this is how you use it -
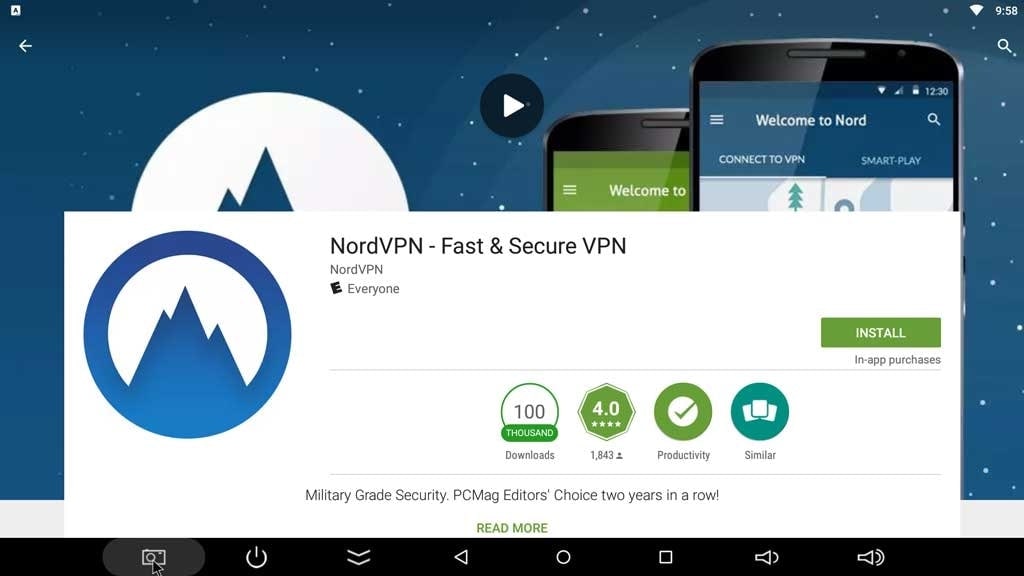
Step 1: Download NordVPN either from Google or App store.
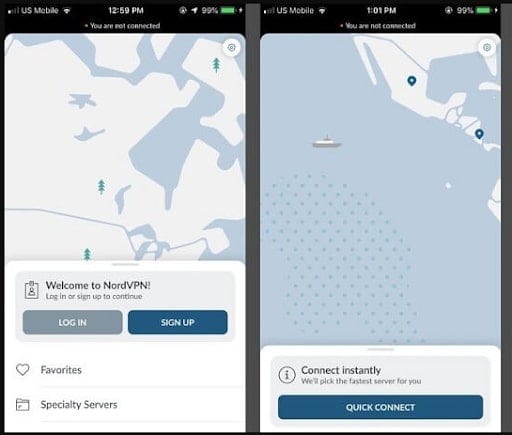
Step 2: You need to sign up and the app quickly connects you to a nearby server. This is the Quick connect option.
Step 3: However, you can change your location too. Go to the ‘More options’ and then choose Servers. Under this, go for All Countries to view the choices you have. Choose one and that server will be activated.
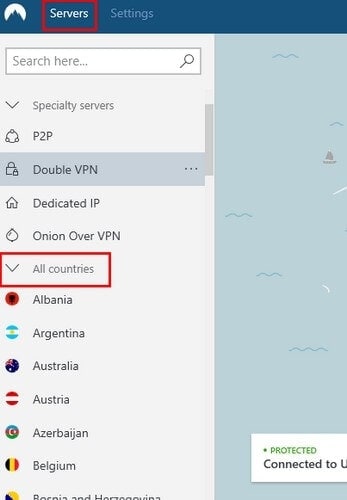
So, the location of this new server will reflect on your snapchat snapmap too.
Part 3: Frequently Asked Questions
Q1. Can you get someone’s Location from Snapchat?
A - Yes, people can easily know your location through Snapchat. The new Snapmap feature makes it all the more easy. The snapmap shows your bitmoji’s location anywhere in the world, as long as your phone’s GPS is ON and you have the snapchat app open. So, people can zoom in and know your exact coordinates and even your house-no and residential details.
Q2. Is Snapchat Location ever wrong?
A - Snapchat tries to provide the accurate location most of the time. It uses your geo-coordinates that it detects when you Switch ON the GPS on your phone. It tracks the location in which your snap is taken and if you are on snapmap and sharing your location, it can provide the exact details of the place you are in. However, there is no authentic report that says that Snapchat shows 100% accurate location or if it can go wrong sometimes.
Q3. How do you tell if someone is hiding their location from you on snapchat?
A - They will disappear off of the world map. Literally! So, whenever someone is hiding their location from you, it means they’ve either activated the Ghost Mode or they turned off the Location services of their phone. As a result, you will not find their bitmoji on the snapmap even if they are actively using the app. But if they’ve employed a Location spoofer, it is hard to say if the location is real or not.
Part 4: Conclusion
Now that you have learnt how to fake location on snapchat map, understand that these methods have their own hierarchy of success. While the location spoofer stands at the top-spot, using a VPN is the next best thing. If you want to rely on in-built features, know that they aren’t always successful. Make the right choice and keep your location a secret for your own privacy.
Also read:
- [New] In 2024, Holistic Health Approaches with Tech
- [Updated] 2024 Approved Crafting Kingdom The Path to YouTube Mastery
- [Updated] GoPro Max 360 vs Hero 11 Which Takes the Lead?
- 10 Best Fake GPS Location Spoofers for Poco M6 Pro 4G | Dr.fone
- 10 Best Hd Android Video Player Apps You Should Know
- 11 Best Location Changers for Oppo Find X6 | Dr.fone
- 11 Best Location Changers for Vivo Y100i | Dr.fone
- 3uTools Virtual Location Not Working On Apple iPhone SE? Fix Now | Dr.fone
- 8 Solutions to Fix Find My Friends Location Not Available On Apple iPhone XR | Dr.fone
- 8 Solutions to Fix Find My Friends Location Not Available On Sony Xperia 1 V | Dr.fone
- A Detailed Guide on Faking Your Location in Mozilla Firefox On Xiaomi 14 Ultra | Dr.fone
- AOL Mail Status: Undergoing Maintenance or Experiencing Outages?
- In 2024, 4 Ways to Transfer Music from OnePlus 12R to iPhone | Dr.fone
- In 2024, Expertly Enhance Photos with Free Technology
- In 2024, Snicker Spinner Picture Editor
- Step-by-Step Tutorial: Transforming Twitter Videos Into GIF Format for Windows Users
- Title: 8 Solutions to Fix Find My Friends Location Not Available On Vivo T2 Pro 5G | Dr.fone
- Author: Mia
- Created at : 2024-10-01 19:49:10
- Updated at : 2024-10-06 21:55:04
- Link: https://location-fake.techidaily.com/8-solutions-to-fix-find-my-friends-location-not-available-on-vivo-t2-pro-5g-drfone-by-drfone-virtual-android/
- License: This work is licensed under CC BY-NC-SA 4.0.