5 Easy Ways to Change Location on YouTube TV On Nokia G42 5G | Dr.fone
5 Easy Ways to Change Location on YouTube TV On Nokia G42 5G
Through YouTube TV, people can access different TV channels such as news, sports, and entertainment. However, as every YouTube TV works in accordance with the assigned home area, sometimes you can forget or are unable to change the home area, which can lead to certain restrictions. If you want to change the location of YouTube TV to access more services, this article is for you.
Continue reading this article to learn how to change your YouTube TV location with the help of easy methods so that you won’t tire yourself. You can easily bypass YouTube TV restrictions by following this authentic guide.
Part 1: Change your Home Area to Change Location on YouTube TV
Before jumping on the method to change YouTube TV location, keep in mind that YouTube only allows changing the location twice a year. In this part, we will provide a manual method to change location on YouTube TV for both iOS and Android devices:
How to Change Your Home Area on an iOS Device
Step 1: Start logging into your YouTube TV account and navigating to your profile icon. Select “Settings” and then tap on “Area.”
Step 2: Afterward, tap on “Home Area” and then choose the option “Update” right next to it.
How to Change Your Home Area on a Computer or Android
Step 1: Signing to your YouTube TV on your Nokia G42 5G or through a web browser. Afterward, tap on your profile icon to proceed.
Step 2: Go to “Settings” from the profile and then select “Area.” Now, locate the “ Home Area” option and click on it.
Step 3: Tap on the “Update” option next to the “Home Area” option.
Part 2: Using VPN to Bypass YouTube TV Restrictions
Sometimes, users encounter certain YouTube TV restrictions due to their home area changes. This section will suggest four amazing VPNs to help you bypass any YouTube TV restrictions.
1. NordVPN
NordVPN is a well-trusted VPN that provides exceptional security and protection from malware attacks. Furthermore, by using this VPN, you can change your device or computer location to any country by selecting a fast and secure server from its available options. Hence, you can enhance your cyber security to a great level through this platform while accessing inaccessible content.

2. Surfshark
Do you want to encrypt your browsing activity on your devices? Use Surfshark to browse in a secure manner so that no one can steal or track your information. You can also change your location through this platform to strengthen your privacy across online sites. You can access any specific YouTube TV content by selecting any location from its US servers category.

3. ExpressVPN
ExpressVPN enables the users to change the server’s location anytime and from anywhere across the world. It gives great reliability access to the server location in 94 countries. Moreover, you can enjoy internet browsing with great network speed through it.

4. CyberGhost
To bring your digital security to the next level, CyberGhost is a good option to rely upon. It is a one-click location changer VPN that helps you connect anywhere within seconds with a secured IP address. After that, you can anonymously visit and use online sites through its encrypted VPN protocols and safely hide your identity.


NordVPN | Surfshark | ExpressVPN | CyberGhost | |
Ranking | 1 | 2 | 3 | 4 |
Max Contract Length | 24 Months | 24 Months | 12 Months | 39 Months |
Torrenting | ✔ | ✔ | ✔ | ✔ |
Monthly Plan Cost | $11.99 | $12.95 | $12.95 | $12.99 |
IP Addresses | 5000 Servers | 3200 Servers | 3000 Servers | 8000 Servers |
Support System | Windows, Mac, iOS, Android | Windows, Mac, iOS, Android | Windows, Mac, iOS, Android | Windows, Mac, iOS, Android |
Support Main Streaming Platforms | Netflix, Amazon Prime, Disney+ | Netflix, HBO Max, Hotstar | Netflix, Apple TV+, Hulu | Netflix, HBO Max, Disney+ |
Part 3: One-stop Tool to Change GPS Location on iOS and Android
Although VPNs provide a great way to change YouTube TV location through IP address, it still lacks accuracy with the location. To be more precise with region accuracy, Dr.Fone – Virtual Location changes GPS location to connect your Nokia G42 5G with a particular area in a specific city. As VPNs change the location by connecting to the city’s server via IP address, Dr.Fone targets the exact location in any city by using GPS.
Dr.Fone - Virtual Location helps the users locate a precise location for YouTube TV to access specific TV channels and features. Moreover, you can instantly change your YouTube TV location with a single click. Using this tool, you can fake your location anywhere in the world with excellent speed.
For changing YouTube TV location through Dr.Fone, use the below instructions:
Step 1: Navigate Virtual Location
Download Dr.Fone on your computer and open its main home page. Select “Virtual Location” from the displayed options by clicking on it. Now connect your smartphone to your computer via a USB cable.

Step 2: Show Current Location
A new window will pop up displaying your current location on a map. However, if you cannot locate it, click on the “Center On” icon that will show your current location.

Step 3: Turn On Teleport Mode
To turn on the teleport mode, click on the second icon that you can locate on the top right. Then, type the area in the search box and press the “Go” button.

Step 4: Confirm Location
Confirm by clicking on the “Move Here” option on the pop-up message. Once done, your phone will be connected to the chosen location, and thus YouTube TV location will be changed automatically.

Part 4: FAQs
- Is it allowed to watch YouTube TV other than the home area?
Yes, it is allowed to watch YouTube TV other than the home area in the US, but the channels will differ from location to location. You can watch national programs, including local programs and other YouTube videos, while traveling domestically in the US.
- How to modify the time zone on YouTube TV?
To change the time zone on YouTube TV, open your YouTube TV and click on your profile icon. Next, go to the “Settings” and tap on the “Area.” Now, locate “Home Area” and upgrade the time zone concerning your home area.
- Is it possible to watch YouTube TV in multiple locations?
You can easily watch YouTube TV in multiple locations, but to be careful, you should check your home area frequently in a month to be aware of local networks.
- Are users allowed to watch YouTube TV at two different houses?
YouTube has provided easy access through membership that allows the users to watch YouTube TV at two different houses. You can create a family group and let 5 members watch YouTube TV.
Conclusion
This writing comprises a detailed guide regarding the YouTube TV change location and the exact steps. We have also mentioned some of the well-trusted VPNs to change YouTube TV location, but to be precise in the results, we have suggested Dr.Fone - Virtual Location as a complete and advanced tool for changing the location.
3 Ways to Change Location on Facebook Marketplace for Nokia G42 5G
Facebook Marketplace is a hub designed within Facebook that enables Facebook users to buy and sell stuff online. This marketplace has optimized the chances of buying and selling legit stuff, including household appliances, clothes, and electronic devices. You must enter the pictures of that product and write a good description.
All the potential buyers from the nearest locations will access it. Moreover, you can look up stuff on the marketplace and order your favorite product with just simple clicks. It is also possible if you want to change the location of marketplace listings to attract buyers and sellers of your nearby areas.
The following discussed points in the article will teach you how to change location on the Facebook marketplace:
Part 1: How to Change Location on the Facebook Marketplace on iOS and Android Devices
The Facebook Marketplace is a feature that finishes the gap between social media and digital marketplaces. With this helpful feature, you can now buy and sell items on your Facebook account to other Facebook users. In addition, you can filter the listings and see the buyers from a specific location by changing to a location.
Here, we will teach you the steps involved in changing the FB Marketplace location on your Android and iOS devices:
Step 1: The first step requires you to open the Facebook app on your Nokia G42 5G or iPhone. Login to your Facebook account to initiate the procedure.

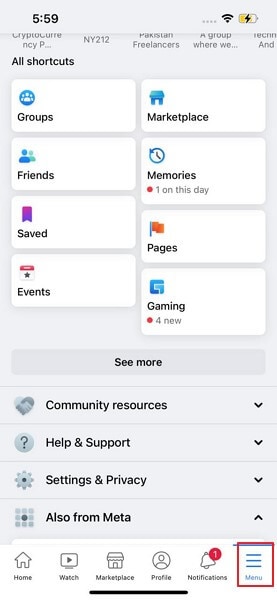
Step 2: If you have an Android device, you will see a hamburger icon situated at the top-right corner. You have to click on it to access the Facebook menu. Or, if you have an iPhone, click on the three dots on the bottom side of the application.
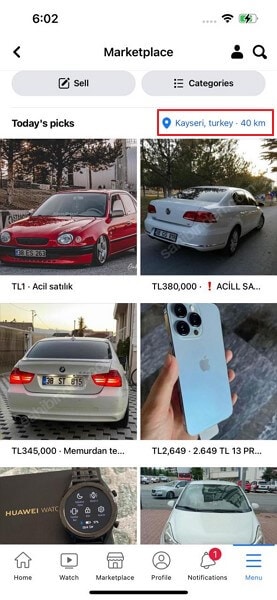
Step 3; After doing the prior step, you will now access the “Facebook Marketplace” feature. Your current location will be written in blue on the upper-right side of the existing Marketplace listings. You should click it to change your Marketplace location.

Step 4: Use the “Search Bar’ at the top of the screen to search and select the new location. After entering the target place, tap on the “Apply” button. You can also adjust the distance slider below “Custom radius” to change the location.

Step 5: Now, the Facebook Marketplace will refresh. You will now be able to see new listings for the selected location.
Part 2: How to Change Facebook Marketplace Location on Facebook Website
If you are using Facebook from a browser, it is also achievable to change the location and control the listings yourself. To perform this process on a browser, follow the given steps and achieve the Facebook marketplace change location:
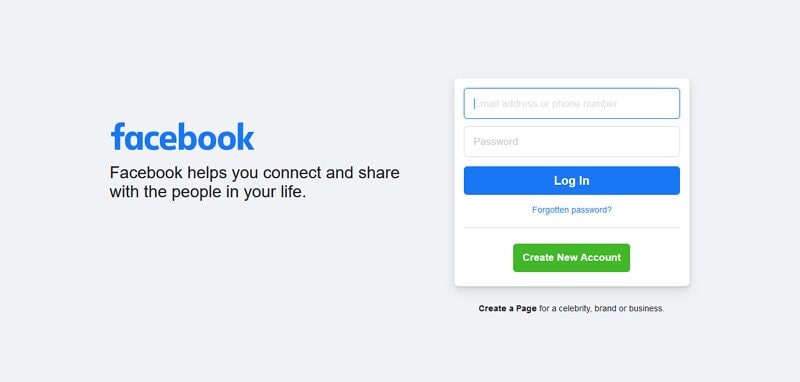
Step 1: Access Facebook through the browser of your choice and sign in to your Facebook account.
Step 2: There will be a “Marketplace” icon; click on it. Now, the current location will be displayed on the screen. You have to tap on your current location to fake the location of your marketplace.

Step 3: Enter the desired location and hit the “Apply” button. The listing search radius can also be changed with the help of the dropdown button.

Step 4: Facebook marketplace will be refreshed, and your new listings for the selected location will be visible.

Part 3: Facebook Marketplace Location Won’t Change? One-Click to Solve It
Dr.Fone – Virtual Location is an application that allows users to change their device location virtually. You can quickly teleport the GPS location to places of your choice. It is now super-easy and secure to virtually change your current location, bypass all the restrictions, and filter the listings on your Facebook marketplace.
What Makes Dr.Fone – Virtual Location the Best Solution?
The application holds a wide range of uses and characteristics, so it is considered the best way to change location. The following key points are mentioned why it is the best location changing solution available:
Dr.Fone - Virtual Location
1-Click Location Changer for both iOS and Android
- Teleport from one place to another across the world from the comfort of your home.
- With just a few selections on your computer, you can change the location on your Facebook marketplace.
- Stimulate and imitate movement and set the speed and stops you take along the way.
- Compatible with both iOS and Android systems.
- Work with location-based apps, like Pokemon Go , Snapchat , Instagram , Facebook , etc.
3981454 people have downloaded it
Simple Steps to Fake your Location on Facebook Marketplace
The following step guide will assist you in changing the location of the marketplace listing to get targeted buyers or sellers for the Facebook marketplace:
Step 1: Install the Program
The first step requires downloading Dr.Fone- Virtual Location (iOS/Android). Now, install it and launch the software on your PC.
Step 2: Connect your Phone
Click on “Virtual Location” from the available options and connect your phone to the computer with a USB cable. IPhone users, once connected, can link the software with Wi-Fi without any USB cable. Now, press the “Get Started” button.
Step 3: Provide your Desired Location
Now, activate the “Teleport Mode” by clicking the first icon on the upper-right side. Next, enter the target place you want to teleport to and click on the “Go” button.
Step 4: Change your Location
Now, click on “Move Here” in the popup box, and your location will be changed. Your Android or iOS device location will be shifted to the added location now. Then, you can open Facebook and see the buyers and sellers of the given location in the Marketplace.
Part 4: FAQs about Facebook Marketplace
- What are the extra services for me after changing my location on Facebook Marketplace?
There are no extra services given on the Facebook Marketplace after changing the location. You will be able to access the audience of the selected location.
- Is it secure if I give my address on the Facebook marketplace?
You must not offer your full name and your contact details. Meet in a safe and public place such as a park, restaurant, shopping mall, or police station. However, you still should not give your details to the buyer.
- Why is my Facebook marketplace displaying the wrong address?
You might have used a VPN service in the past, which affected your actual address on the Facebook Marketplace. Don’t worry, as you can change the current location with a mere click.
- How to change the Facebook marketplace plan?
There is no plan required to use the Facebook Marketplace. This feature is entirely free for all Facebook users.
- How to maximize sales on the Facebook marketplace?
There are various methods to attract more buyers to you. First, try to optimize the Facebook listing by adding more keywords in the description and title. Also, write a longer description and explain more details about the item. You can also hire a photographer who will take good pictures of your product.
Conclusion
The article concludes with how to change location on the Facebook Marketplace to perceive buyers and sellers of your nearby areas. This way, you will be able to meet the buyer or seller yourself and discuss the product peacefully. With Dr.Fone - Virtual Location , you can change the location of the marketplace listing and teleport to a place you want to sell/buy in.
 safe & secure
4 Methods to Turn off Life 360 On Nokia G42 5G without Anyone Knowing
Life 360 has made tracking our friends and loved ones so easy. It is an excellent choice for staying updated about family when you have security concerns. Despite this, it can be intrusive when you need your privacy. If you’re a group member and wonder how to turn off Life360 without parents knowing on iPhone and Android devices, you’re in luck. This article will provide you with a complete guide on how to turn off Life 360 without anyone knowing.
Part 1: What is Life 360?
Many applications are available today to help family and friends track each other for various purposes. One such app is Life360, and it has been successful since its launch. This tracking app makes it easy to trace the location of your loved ones or anyone you want to track. But, first, you need to create a circle of friends on a map.
Life360 works by sharing your GPS location on the map, allowing the members of your circle to view it. As long as your GPS location is turned on, those in your circle will always have access to your exact location. Life360 developers are continually releasing new features to improve their tracking function.

Some of the available Life360 features include notifying you when a member of your circle moves to a new point and it will send a help alert when there’s an emergency. In addition, the app automatically contacts the emergency contacts you added when you do this. However, this doesn’t change that it can get intrusive when you need some privacy. That’s why the next section covers how to turn Life360 off.

Part 2: How to Turn off Life360 without Knowing
There are times when you want to turn Life360 off without it showing so that people don’t know your present location. But, if you have no idea how to go about it, you’re in luck. This section covers the best methods to stop sharing your location with friends and family on Life360.
1. Turn Off Your Circle’s Location on Life360
There is the possibility of limiting the details about your location to others in your circle. One way to turn Life360 without anyone knowing is by choosing a circle and disconnecting from them. The steps below break down the entire process.
- First, launch Life360 on your device and navigate to ‘settings.’ You can find it at the bottom right corner of the screen.
- Next, choose a circle you want to stop sharing your location with at the top of the page.

- Tap on ‘location sharing’ and click on the slider next to it to disable location sharing.

- Now you can recheck the map, and it will show ‘location sharing paused.

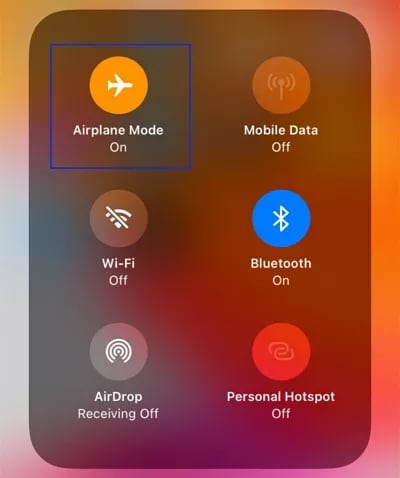
2. Turn off Your Nokia G42 5G’s Airplane Mode
Another option you have to stop sharing location on Life360 is by switching on Airplane mode. You can do this on your Android and iOS devices. Once you enable Airplane mode, you’ll see a white flag on your last saved location.
For your iOS devices: open ‘control center’ and tap on the ‘airplane mode’ button. Alternatively, you can go to settings and tap on ‘airplane mode’ to switch it on.
For Android owners wondering how to turn location off on life360 through Airplane mode, swipe down from the top of your screen and select the ‘Airplane mode’ icon. You can also turn it on by visiting ‘settings’ and selecting ‘network & internet’ from the option displayed. Finally, find the airplane mode and switch it on.

These steps will help you turn off location sharing on Life360. However, the downside of using Airplane mode is that it prevents you from accessing the internet. In addition, with the Airplane mode turned on, you can’t make or receive phone calls, either. Therefore, we don’t recommend this as your top choice when learning to turn off Life 360.
3. Disable GPS Service on Your Device
Another top method of turning off Life360 is disabling the GPS service on your device. It is an effective option, and you can carry it out on your iOS and Android devices. Below, we’ll break down the steps of doing this on your Android and iOS devices.
For iOS
iOS users can easily turn off GPS services by following the steps we’ll be providing below.
- First, open Settings on your smartphone.
- Next, locate the ‘personal’ category and tap on ‘location services’ from the options displayed.
- Next, disable GPS location services

For Android
You’re not left out of this option; below are the steps to disable GPS service on your Nokia G42 5Gs.
- Firstly, visit ‘settings’ on your device.
- On the menu, scroll to ‘privacy’ and tap on it.
- It will open a new page. Select ‘location’ from the options provided.
- If you want to disable GPS services on your Nokia G42 5G, turn off location tracking for apps.

Part 3: Best Ways to Fake Location on Life360 without Anyone Knowing-Virtual location [iOS/Android Supported]
Although Life360 can be helpful in emergencies or security issues, it can also prove quite problematic. If you want some privacy or don’t trust members of your circle, you might want to learn how to turn off Life 360. The problem with turning off the Life360 location is that members of your circle might notice, which would inevitably cause some conflict.
Fortunately, you have another effective option, and that is by faking your GPS location using a location spoofer. You can display the location you want while keeping your true location safe on Life360. Dr. Fone –Virtual location is an excellent tool for faking your location.
Dr.Fone - Virtual Location
1-Click Location Changer for both iOS and Android
- Teleport from one location to another across the world from the comfort of your home.
- With just a few selections on your computer, you can make members of your circle believe you’re anywhere you want.
- Stimulate and imitate movement and set the speed and stops you take along the way.
- Compatible with both iOS and Android systems.
- Work with location-based apps, like Pokemon Go , Snapchat , Instagram , Facebook , etc.
3981454 people have downloaded it
Steps to Fake Location Using Dr. Fone – Virtual Location
Below, we’ve broken down the process for you; keep reading to learn how to fake location using Dr. Fone – Virtual Location.
1. Firstly, you have to download Dr. Fone – Virtual Location on your PC. After downloading and installing, launch the app to get started.
2. Select ‘virtual location’ from the options displayed on the main menu.
3. Next, connect your iPhone or Android device to your PC and click ‘get started.’

4. Next, you have to turn on the ‘teleport mode’ by clicking its icon at the upper right corner of the screen.
5. Now, enter the location you want to teleport to on the upper left side of the screen and then click the ‘go’ icon.
6. Click ‘move here’ in the popup box to change your location to this new place.
Automatically, your location will change to the chosen place on the map and your mobile device.

Part 4: FAQ About Turn off Location on Life360
1. Are there any risks to turning off GPS location?
Yes, there are some dangers associated with turning off location on Life360. No one knows where you are anymore, which could be dangerous in the case of an emergency.
2. Can Life360 track my location when I switch My Nokia G42 5G off?
When your phone is off, your GPS location is automatically disabled. Therefore Life360 won’t be able to track your location; it will only display your last logged location.
3. Does Life360 tell my circle when I turn off the location?
Yes, it does. It will send a ‘location sharing paused’ notification to all your group members. Additionally, if you log out from Life360, it will notify your circle immediately.
Conclusion
Life360 is a useful app for professional and personal circles. However, it can be intrusive on our privacy sometimes. Most times, the youths want to learn how to turn off Life360 without their parents knowing on iPhone and Android devices. This article provides you with different methods you can achieve this. If you want to learn how to turn off life 360 without showing up, the best option is to fake your location. We hope the guide above helps you utilize Dr.Fone - Virtual Location without any issues.
Also read:
- [Updated] Cross-Device The Ultimate Tutorial for Scraping GIFs From FB for 2024
- [Updated] In 2024, Unleash Your Creativity with YouTube's Green Screens
- 11 Best Location Changers for Vivo V29 Pro | Dr.fone
- 2024 Approved List of 8 Best Free and Paid Movie Apps for iPhone
- 5 Easy Ways to Change Location on YouTube TV On Samsung Galaxy S23 Tactical Edition | Dr.fone
- 6 Ways to Change Spotify Location On Your Asus ROG Phone 7 | Dr.fone
- 6 Ways to Change Spotify Location On Your Oppo Reno 8T | Dr.fone
- Can Advanced Language Models Provide Essential Tips for Outdoor Emergencies?
- Discover the Ultimate Selection of Free Language Sites
- How To Unlock SIM Cards Of Samsung Galaxy F15 5G Without PUK Codes
- Title: 5 Easy Ways to Change Location on YouTube TV On Nokia G42 5G | Dr.fone
- Author: Mia
- Created at : 2024-10-28 17:46:08
- Updated at : 2024-10-29 19:21:36
- Link: https://location-fake.techidaily.com/5-easy-ways-to-change-location-on-youtube-tv-on-nokia-g42-5g-drfone-by-drfone-virtual-android/
- License: This work is licensed under CC BY-NC-SA 4.0.